I’m sure you read the title of this post and thought, “Really? Overnight? No way. There must be a catch.”
Nope, no catch. There are some very simple and easy things you can do in about 10 minutes to dramatically increase your pageviews. When I say dramatically, I mean like double or triple OVERNIGHT. Seriously.
And the best part? You can apply these techniques to WordPress OR Blogger! Make sure you read to the bottom because I give you a second technique after detailing switching to teasers for WordPress and Blogger…
Switch Your Posts to Teasers (a.k.a. Excerpts or Magazine Layout)
A lot of bloggers are hesitant to switch to teasers because they think their readers won’t like it. But let me tell you why switching is doing your readers a major favor (even if they don’t like it at first!): it allows them to quickly see more of what your blog offers at a quick glance. Rather than scrolling through one or two endless posts that may or may not appeal to them, they can quickly see…”Oh, hey, she has tutorials! And sew-a-longs! And free patterns! Awesome!”
And for you, using teasers means lots more pageviews. Imagine this…if a reader comes by your blog homepage (one pageview), and they see that first post as a teaser, they then click through to the full post (two pageviews). Already, you’ve doubled what would have only been a single pageview since previously they could see your post in its entirety upon the initial visit. Now, imagine if you have several posts on your homepage as teasers that they want to check out. Instead of simply scrolling down the column of full posts (one pageviews), they have to click through each teaser to see the different posts (multiple pageviews). Before, they may have never even seen all your great content, but with teasers, they get so much more.
So, how do you set up these teasers? It’s easy. You can have your theme do it automatically in WordPress (if you have one that offers the capability), or you can set them up manually in WordPress OR Blogger. First, I’ll show you how to do it manually since more of you are probably in that boat.
Setting up Teasers in Blogger
In Blogger…there’s a little icon at the top of your post box that looks like a piece of paper torn in half. If you hover over it, it says “Insert Jump Break”:
Then, just click on that icon, and the break will appear:
It’s as simple as that. Now, your readers will have to click through a “Read More” link to see the rest of the post.
Setting up Teasers in WordPress – Manual Style
Manually setting up teasers in WordPress is just like setting them up in Blogger. You simply put the cursor where you want to insert the break:
And then click to add the break:
See? Easy as pie!
Setting up Teasers in WordPress – Automatic
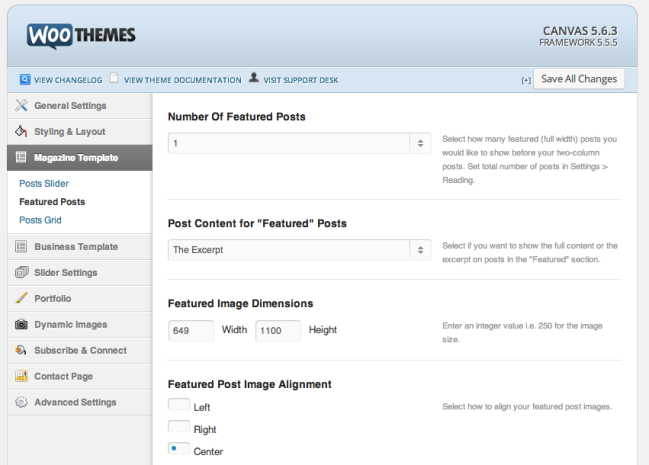
Not everyone is going to have this capability – it totally depends on your theme. I use a heavily modified Canvas by Woo Themes, so that’s what I’ll be using in my example. Just click around in your theme settings to see if you have something similar.
In Canvas, this is called the Magazine Template. I have set my featured post to be an excerpt, as you see below:
…and I’ve done the same for the grid of teasers that shows up below the featured post:
Done! Pageviews will double pretty much immediately!
Truncating Your RSS Feed in Blogger
Now, there’s another thing you can do to dramatically increase your pageviews (and your unique visitors, too!): truncate your RSS feed. This is super easy-to-do in WordPress AND Blogger.
In Blogger, go to Settings–>Other. You will see you have a few options for setting up your feed. I recommend setting it to “Until Jump Break” or “Short.” You can experiment with them to see which looks best to you in Bloglovin’ or an RSS reader.
Truncating Your RSS Feed in Wordpress
Truncating your RSS feed is done almost the same way in WordPress. Simply go to Settings–>Reading, and you will find the settings there:
Where it says “For each article in a feed, show,” select “Summary:”
Perfect! The next time you make a post, check to be sure a featured image is still showing up on Bloglovin’ or Feedly. If it’s not, you should add the Add Featured Image to RSS Feed plugin in your WordPress dashboard. All you have to do is upload and activate it, and it will do its job.
Checking Your Pageviews in Google Analytics
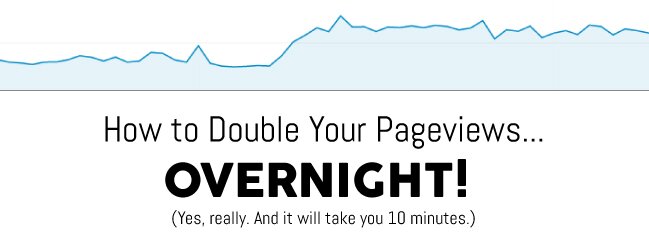
After just a couple days, you should notice a dramatic increase in your pageviews and pages per session metrics in Google Analytics. You can see a definite jump in my pages per session when I made these changes. To see these analytics, simply click on the drop-down menu under the “Overview” tab…see the little box that says “Pages/Session?” Yeah, just click on that to access the drop-down. You will also see Pageviews there. ![]()
Okay, looks like you guys have some work to do! I hope you enjoyed this tutorial!


