Baste + Gather

Sewing

Birkin Flares Testers, Part II

Selvage Designs, SewingLauren DahlComment

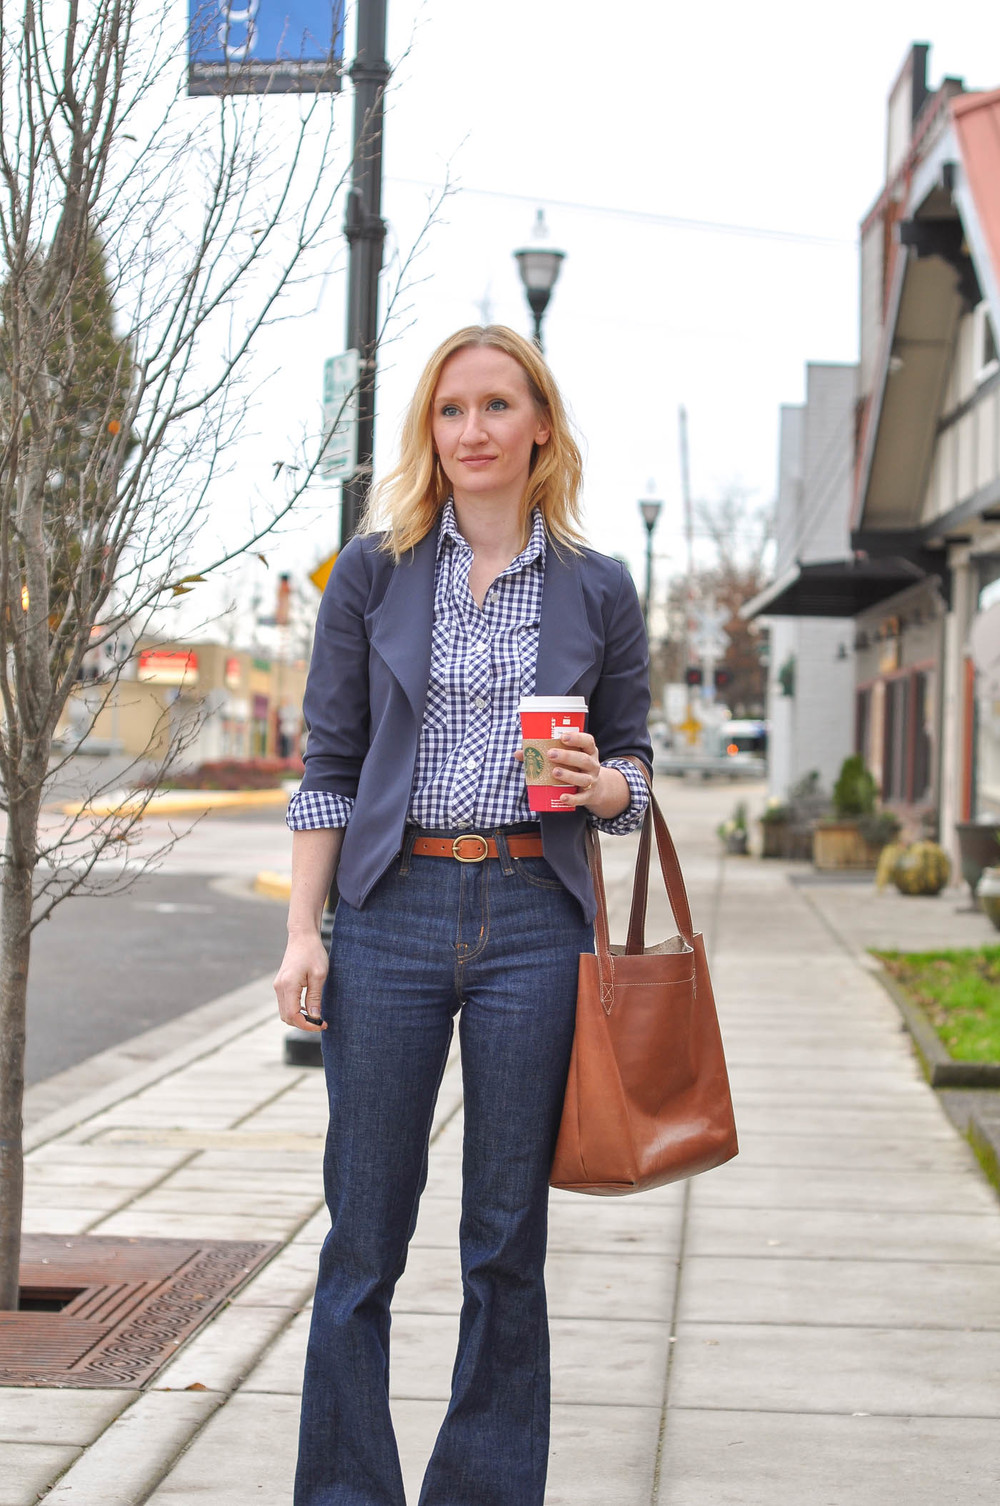
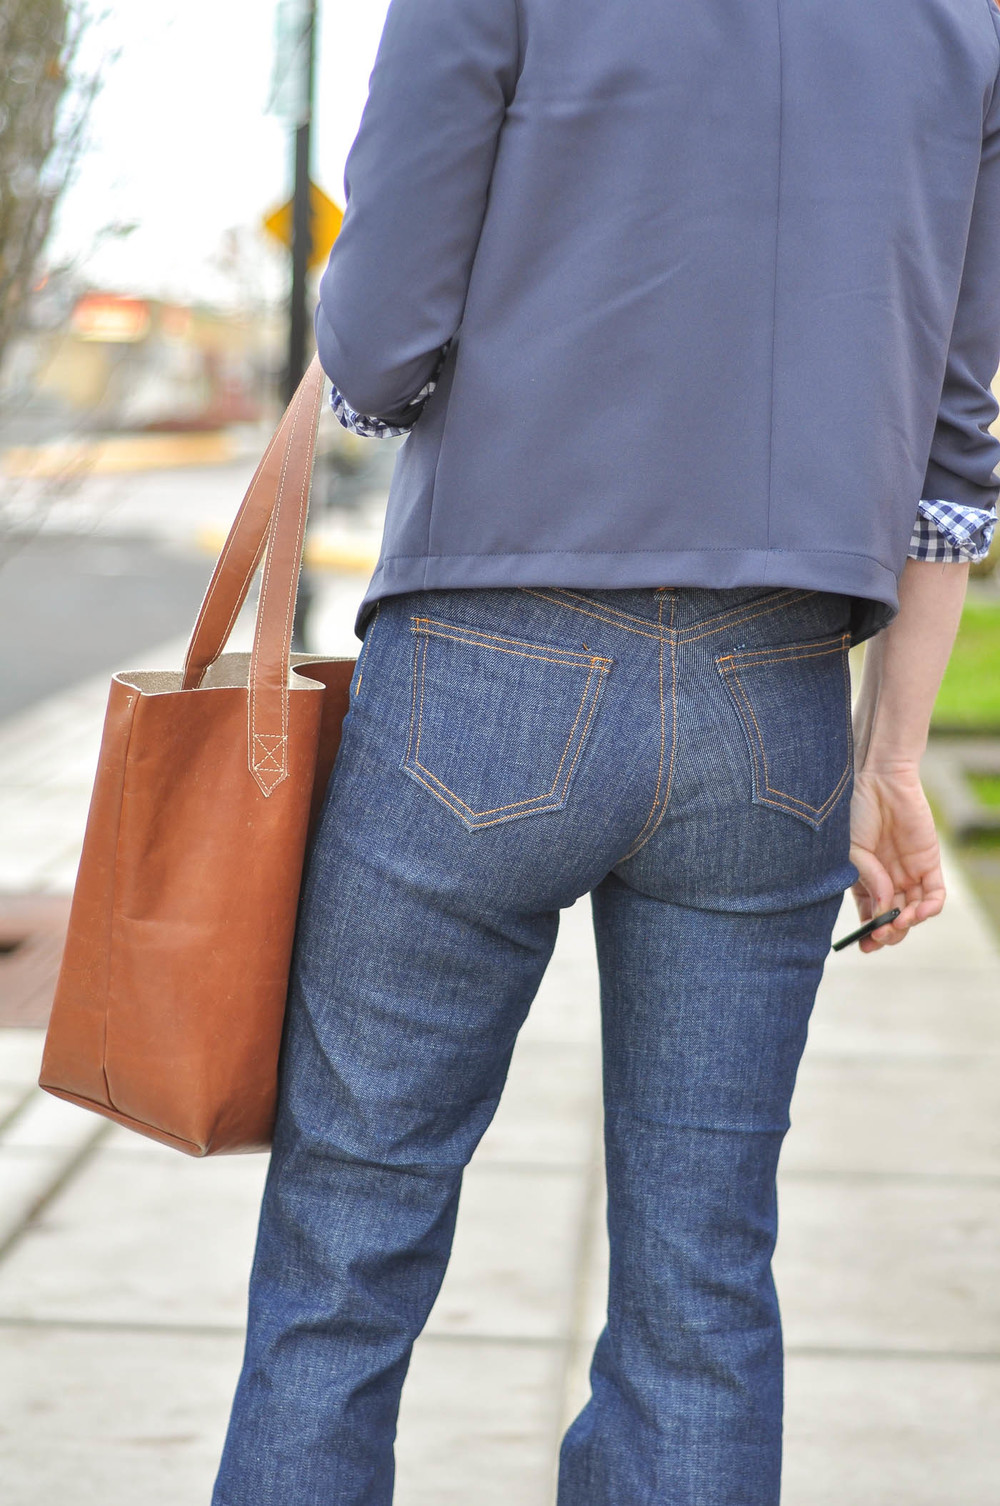
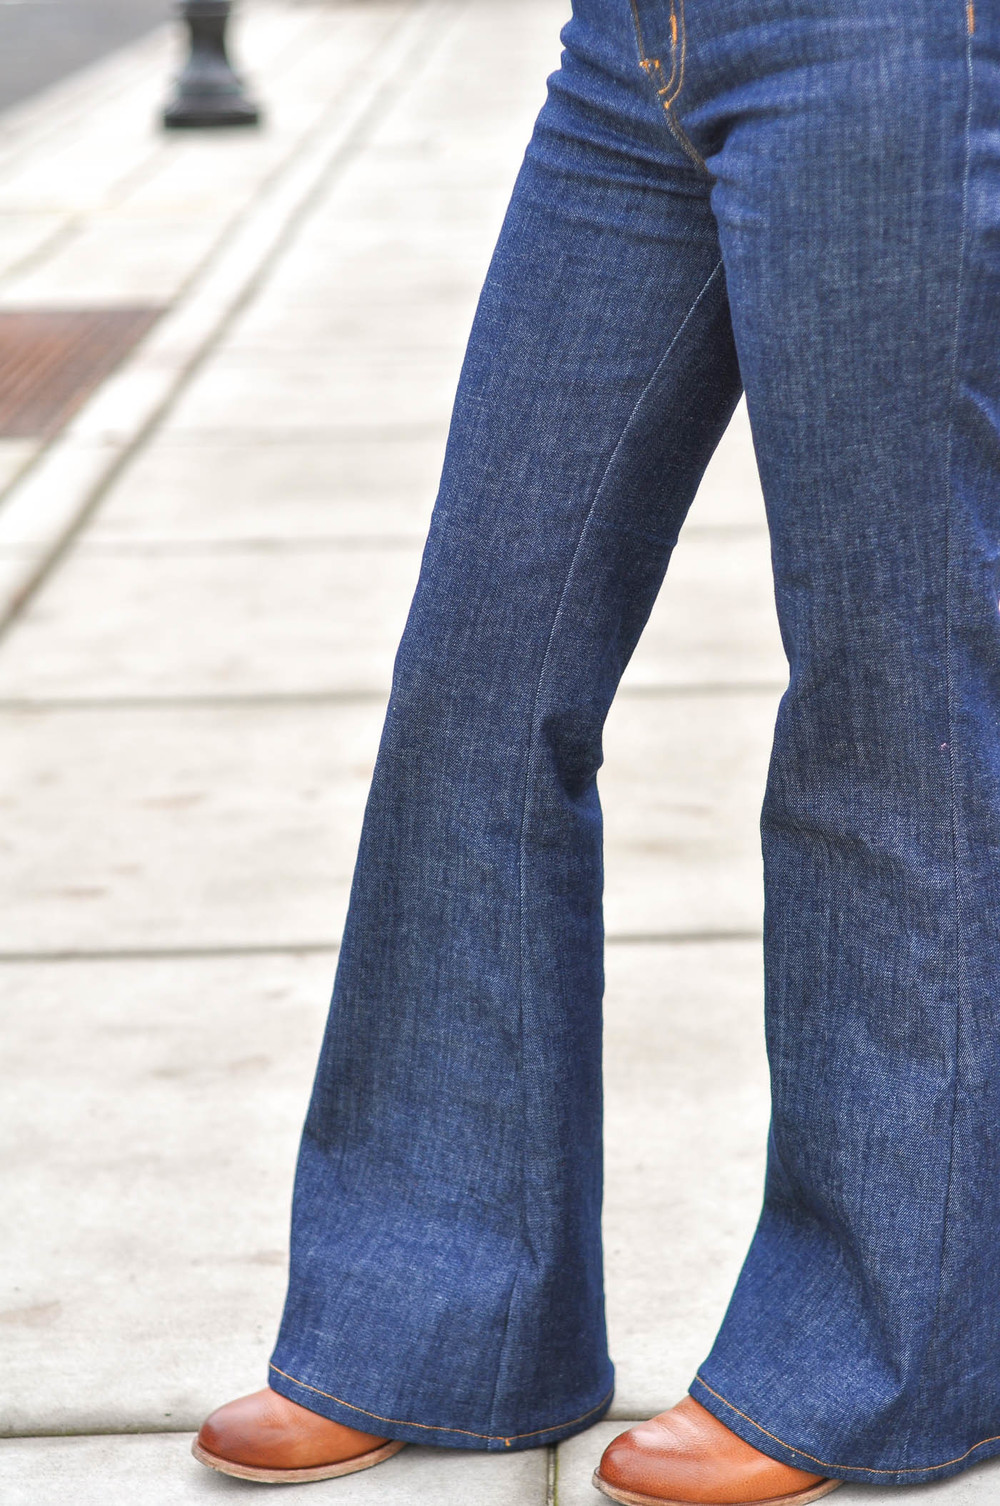
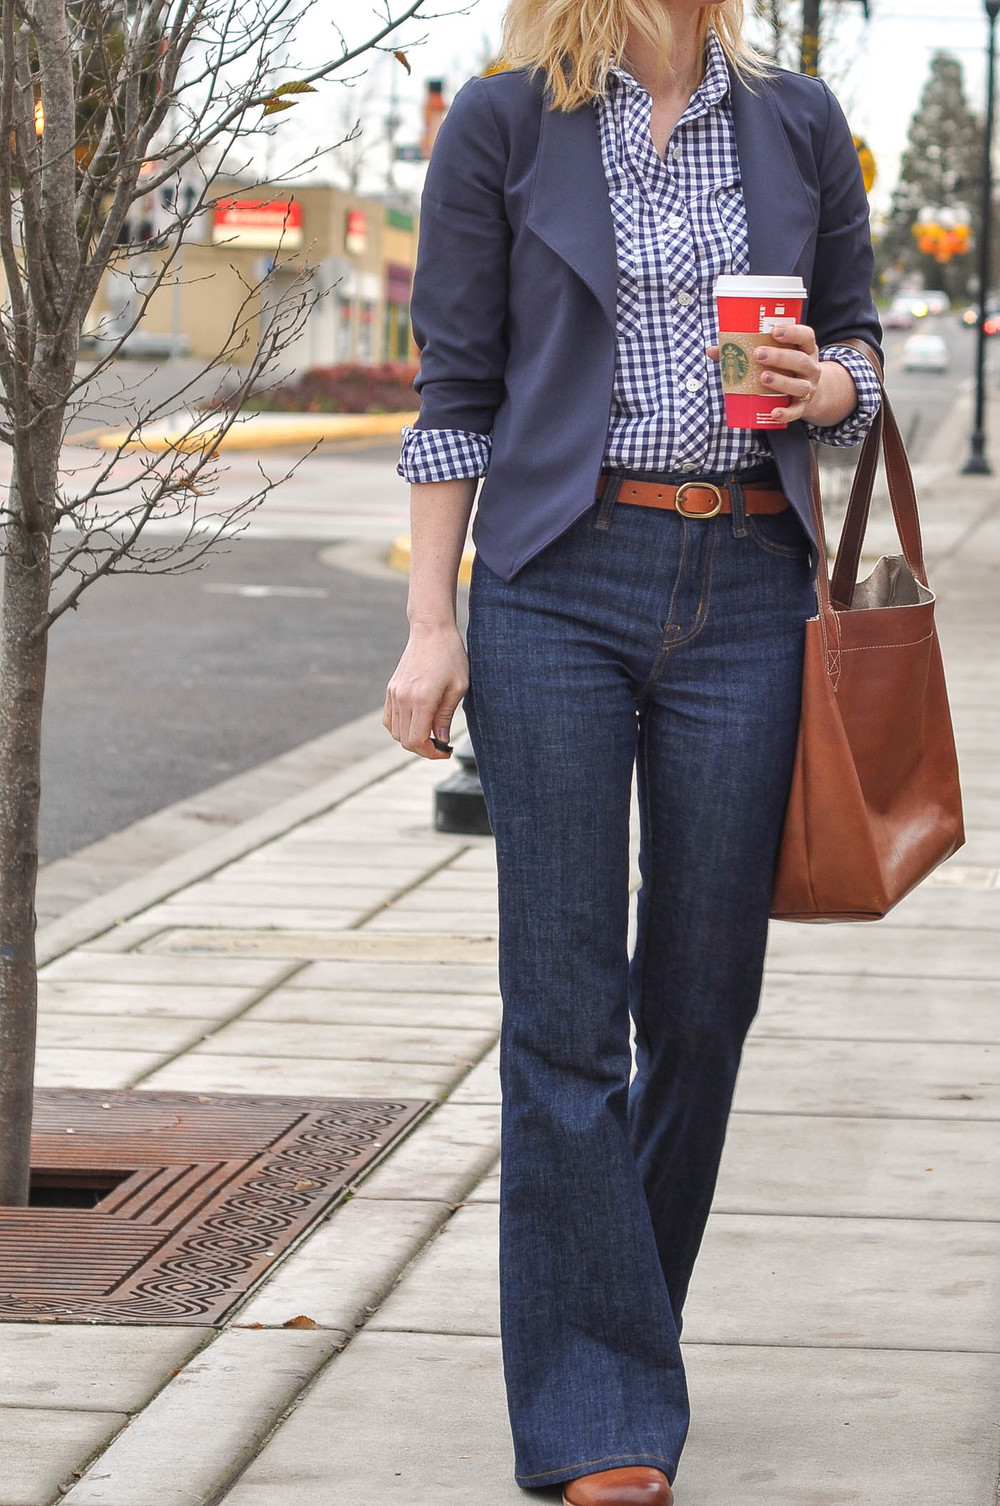
Kimberly from Straight Stitch Designs

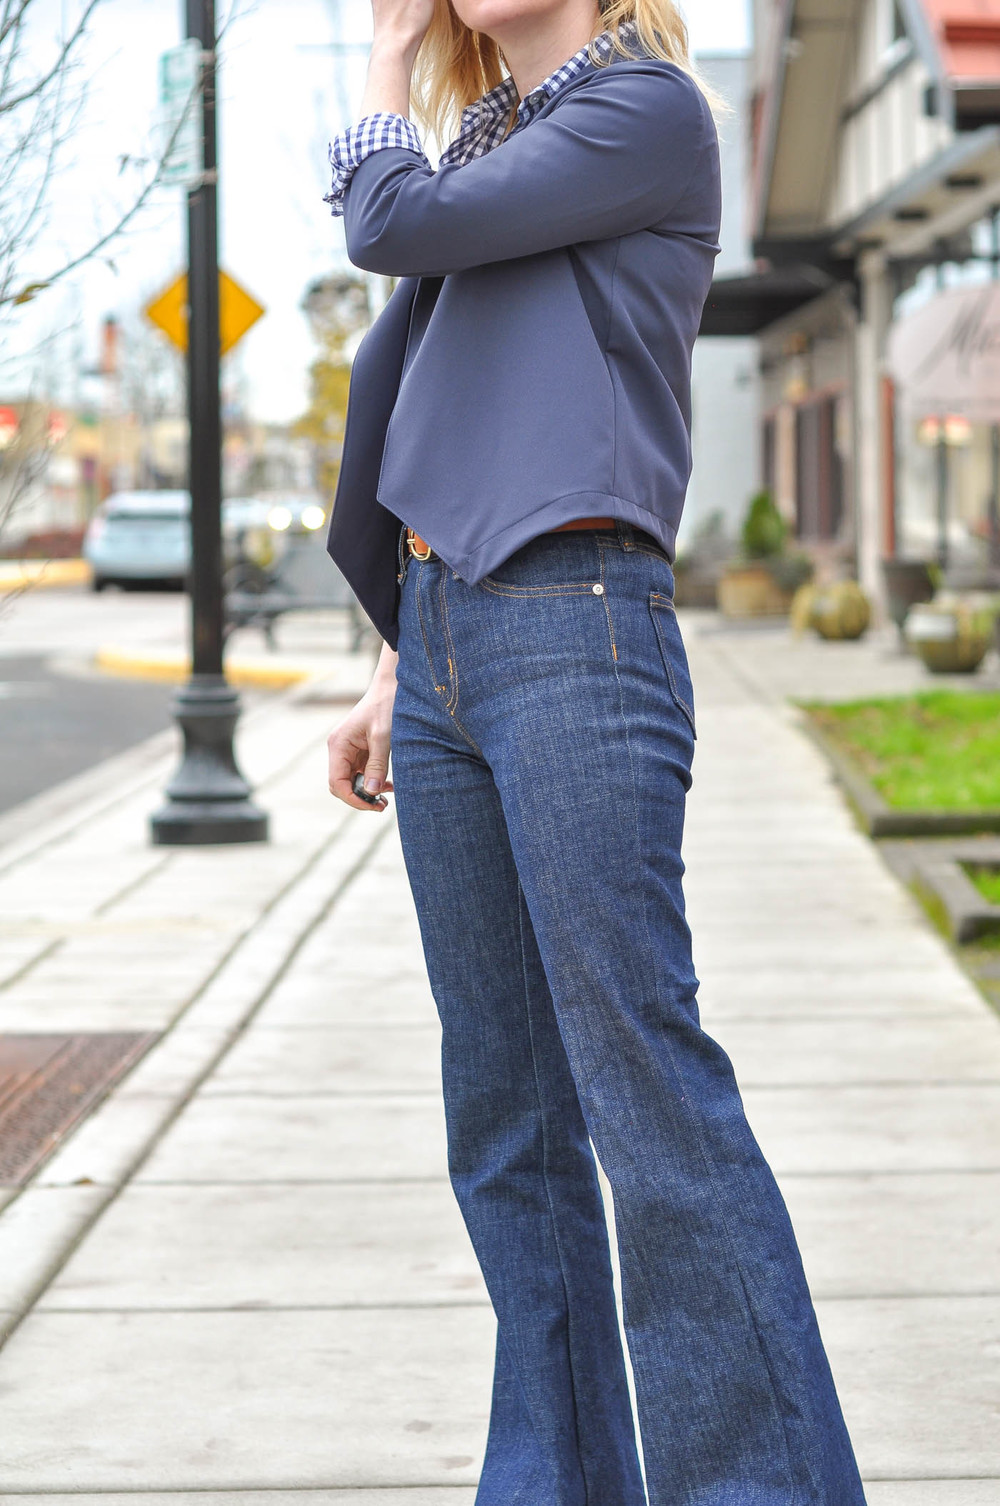
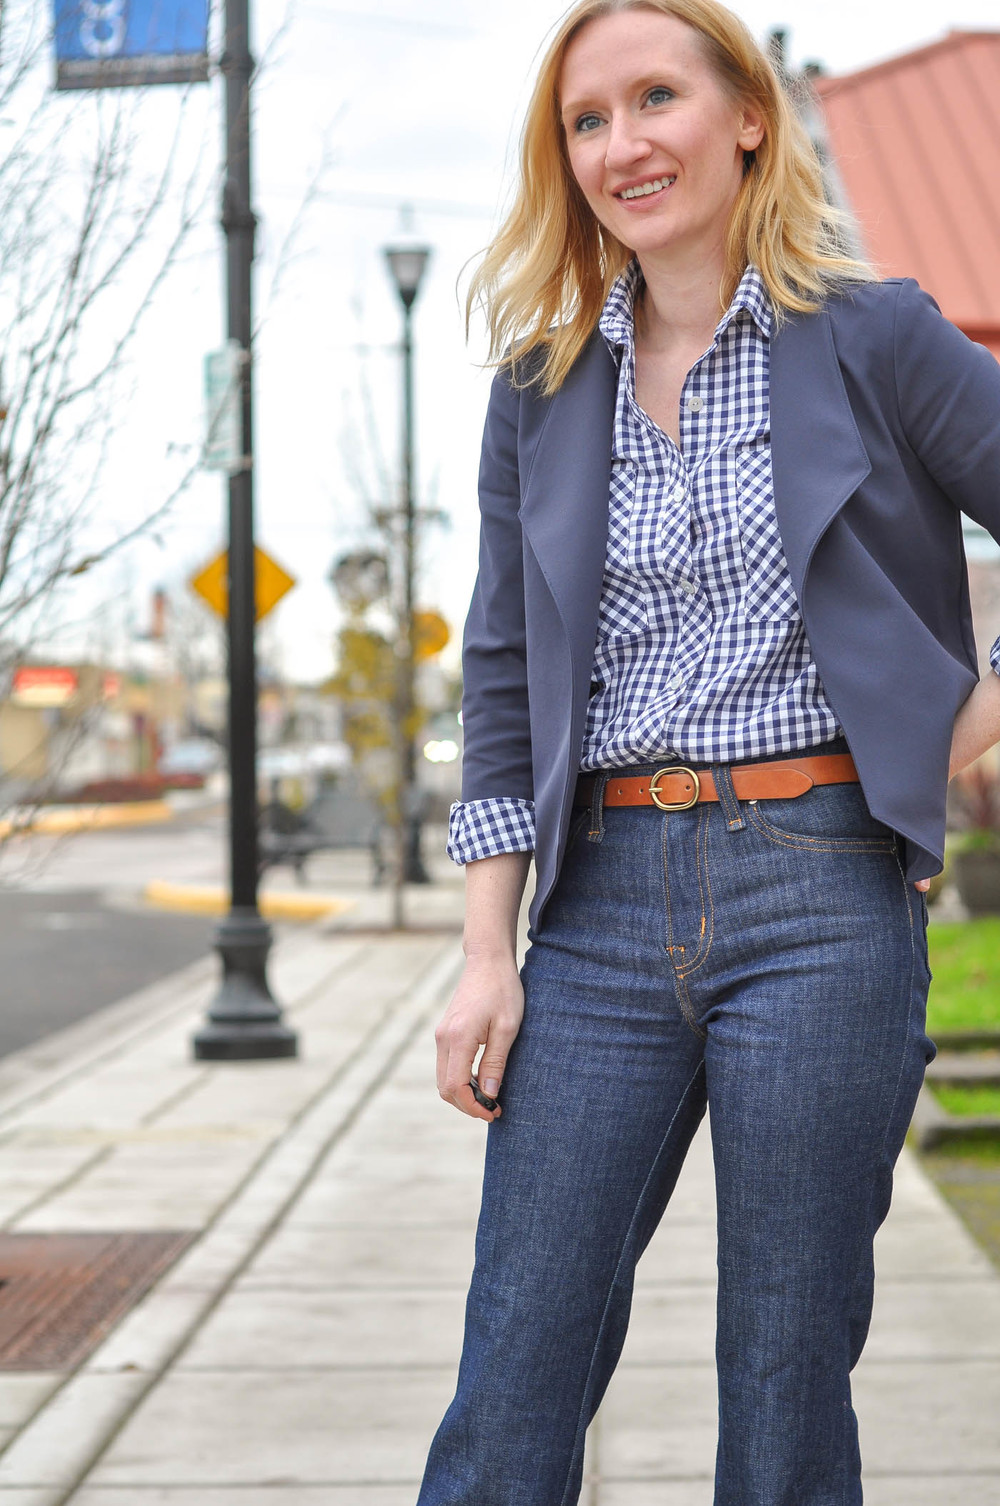
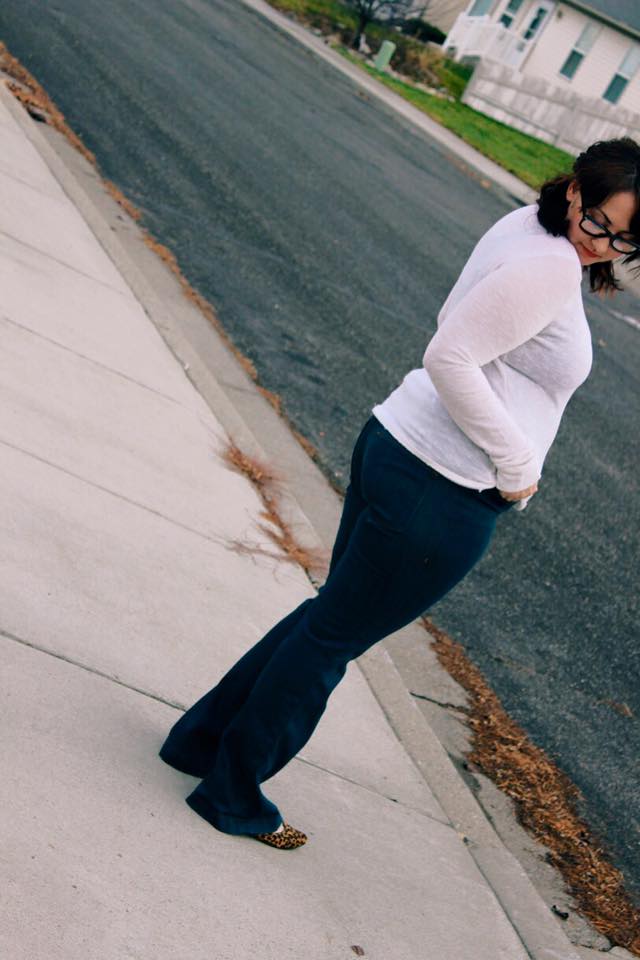
Today I have a treat for you - a few more photos from the testing phase of the Birkin Flares release! If you haven't checked out the first HUGE roundup, you can see it here. And here are a few more...

(Testers' blog posts linked after each set of photos. Click on any image to see a larger version.)

Kaysie from KZJO"Studio

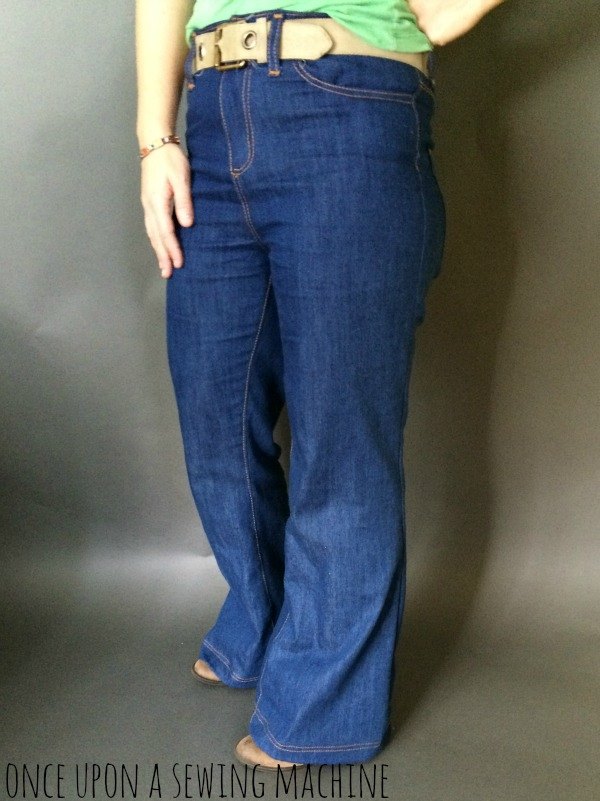
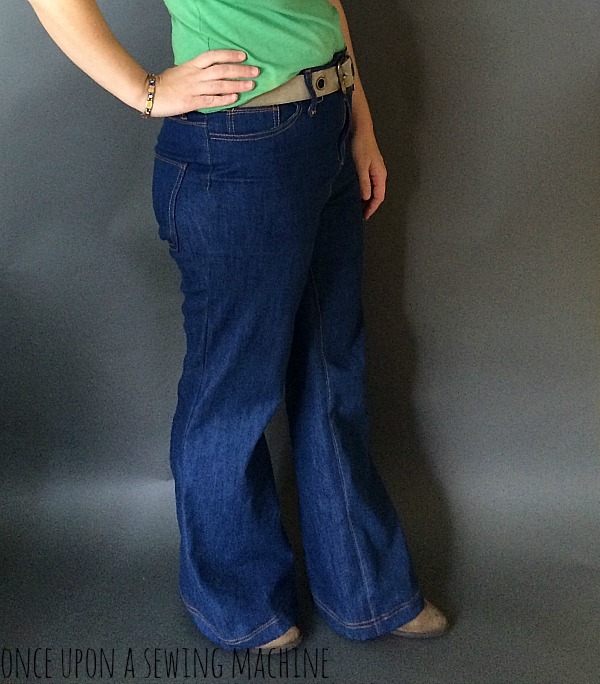
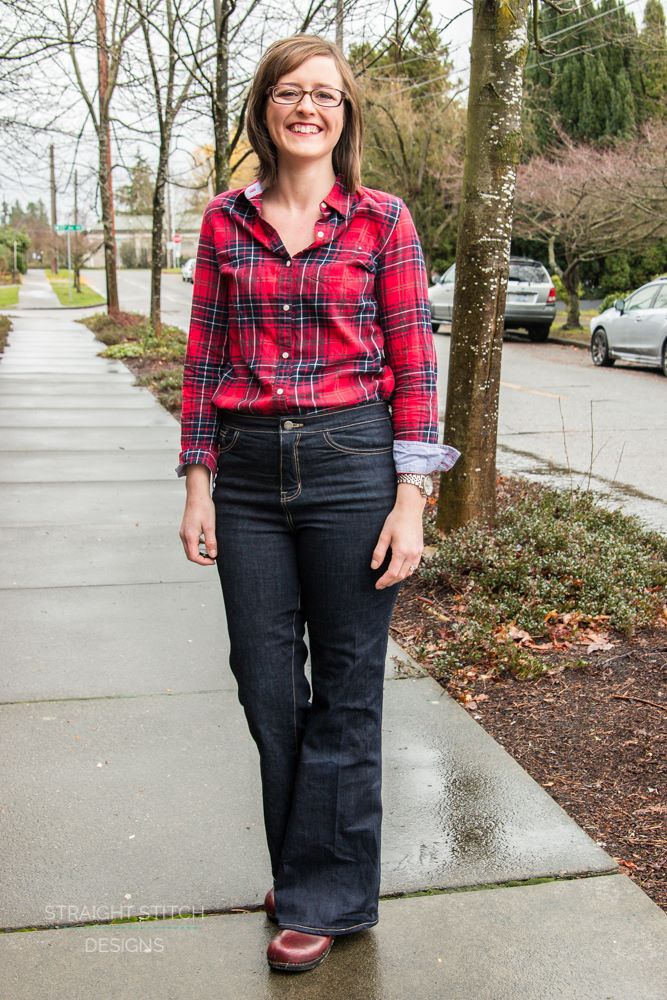
Rachel of Once Upon a Sewing Machine

Whew! I think that covers all my testers. I had such a fabulous group of ladies working on this with me, and I can't wait to show you the Kendall Skinnies they've been sewing up. Here's to all the handmade jeans in 2016! xoxo

Simplicity 1071 Top in Lightweight Sweater Knit

Sewing, My HandmadesLauren DahlComment

Simplicity 1071 with Birkin Flares and the slouchy Jane hat: comfort dressing at its best! I whipped up this top recently and have been wearing it quite a bit, but as usual, I am just getting around to blogging about it. 

I made a size small, 10-12, and I could probably even go down to the extra-small. However, I love the slouchy, comfortable look. The only thing I might change next time is to narrow the sleeves a little as they don't stay up too well when I push them to/above my elbows. 

The fabric is something that's been in my stash for over a year. It's a lightweight, semi-sheer sweater knit I purchased at A Fashionable Stitch in Salt Lake City before we moved (and they went out of business). It's spongy enough to be kind of warm, but it's sheer enough that it demands a camisole underneath. It has the perfect weight and drape for this top. 

This top is really similar to the Grainline Studio Hemlock Tee (which is a free pattern), so you could definitely download that one as an alternative if you don't have this pattern on-hand. I was simply in need of an instant-gratification (read: no tiling/taping) project the night I made this, so paper pattern it was. 

I'm sure I'll be making this again as it's a wonderful, wardrobe-building, quick/easy sew. For your size-selection reference I am 5'6" and about 33-26-36/125lbs in the photos above. 

Happy sewing!

Janome Skyline S7 Review

SewingLauren DahlComment

As you guys probably know, I am part of the On-Loan Program at Janome America. They provide with me sewing machines to try, and I, in turn, write reviews, work on special projects and create tutorials for them. Most recently, they sent me their new Skyline S7 to try, and I have been super pleased with this machine! In fact, I used it as my everyday machine (replacing my MC8900) for the last couple months, and it's been a real trooper (mostly - keep reading) through all the denim I forced it to sew during the design of the Birkin Flares

But before I get into the nitty gritty of this review, I want to give my usual disclaimer. I was not paid for this review. Janome sends me the machines at no cost, and I return them when I am done. They encourage me to list both the things I like and dislike about the machines, and I am not given talking points or asked to "sell" or promote the products. They ask for a fair and honest review, and that is what I provide. 

The first thing I noticed upon opening the box was the impressive number of standard accessories included. Some high-end machines include only the basics so you have to pay quite a bit to get all the other items you need, but not Janome machines. As primarily a garment sewist, most everything I need is here (and a few that I don't since I don't do much free-motion quilting): zigzag foot, 1/4" seam foot, walking foot, buttonhole foot, button foot, blind hem foot, overedge foot, rolled hem foot and zipper foot. The only things I'd like to see (that aren't already there) are a Teflon foot and an invisible zipper foot. Each of those is available for less than $20 USD each. 

Standard Accessories

  • 1/4 Inch Seam Foot O
  • AcuFeed Flexâ„¢ Dual Feed Foot
  • Automatic Buttonhole Foot
  • Blind Hem Foot G
  • Darning Foot
  • Extra Large Foot Controller
  • Overedge Foot M
  • Rolled Hem Foot
  • Satin Stitch Foot
  • Seam Ripper
  • Zig-Zag Foot
  • Zipper Foot E

One thing I love about all the Janome machines I've used is the on-machine storage. The Skyline S7 doesn't have as much as my MC8900, but it does have this handy area on the front of the machine. You can store several of your most-used feet, some bobbins, the buttonhole foot and walking foot and several other small items for quick access. 

The machine also has a removable free arm which isn't something I use much. I know a lot of garment sewists won't buy a sewing machine without one, but I worked on an MC6500 for a couple years which did not have one, and I got used to it. I now prefer the methods I used with that machine, but having the ability to remove the bed is still nice at times. 

Key Features

  • 240 Built-In Stitches
  • 11 One-Step Buttonholes
  • 7 Alphabets
  • Top Loading 9mm Full Rotary Hook
  • USB Port for adding Stitches
  • Stitch Composer Stitch Creation Program
  • Automatic Thread Tension
  • Built-In Advanced Needle Threader
  • Snap-on Presser Feet
  • Easy Set Bobbin
  • Easy Bobbin Winding Plate with Thread Cutter
  • Memorized Needle Up/Down
  • Automatic Presser Foot Lift
  • Automatic Thread Cutter
  • AcuFeedâ„¢ Flex Layered Fabric Feeding System
  • Variable Zig-Zag for Free Motion Quilting
  • One-Step Needle Plate Conversion

And according to the machine's product page on the Janome website: 

The Skyline S7 comes with 240 built-in stitches, including 11 one-step buttonholes and 7 alphabets. Quilters and designers will enjoy the AcuFeed™ Flex Layered Fabric Feeding System and the Automatic Presser Foot Lift. The 11 buttonholes can be customized for stitch width, stitch density and buttonhole opening. Along with that, the 7 alphabets also go up to a 9mm width with a revised letter size and shape for increased realism and balance. Navigation through all of these features has become easier with the Skyline S7’s new LCD color touchscreen.

There was no way I could try out every. single. feature. of this machine in just a few short weeks. Instead, I simply sewed on it to see how I liked it. I made two pairs of jeans and found that it worked reasonably well on what many consider to be the true test of a machine's ability: multiple layers of denim. 

The machine handled it brilliantly until I got to the belt loops. I switched to my MC8900 to see if it fared any better, and unfortunately, it didn't. (My MC6500 that i previously used also had problems with this.) Womp, womp. On the other hand, it did a great job with the topstitching thread (once I got the right needles - size 14 topstitching from Schmetz) and sewed a fabulous keyhole buttonhole. 

(The takeaway: Don't look at the belt loops on any of my handmade jeans! And get an industrial sewing machine if you want them to look perfect!)

As for the stitch quality, well...just take a look above. It is impeccable! I created these samples using a doubled piece of muslin with no stabilizer, and already, the stitches look fabulous. Buttonholes are also a breeze on this machine (no more holding your breath!). You just pick which buttonhole you want to sew with the handy touchscreen, pop a button into your buttonhole foot and go. Just watch! (No hands, really!)

Overall, I was very impressed with this machine. It does a lot of amazing things that I would never do as a garment sewist, but it would be an absolute dream machine for a quilter, home decor sewist or heirloom sewist. The MSRP on this machine is $2,999, so it's definitely not in everyone's budget, but for the serious artisan, it would be a fabulous choice. 

Now, I know what some of you are thinking - "Who the heck can afford a $3K machine?!" I know, I know. WELL...while I am sad to see this girl go, I have some good news for those of you looking for a more entry- or mid-level machine. I will be reviewing two machines in the next couple months that are designed for sewing garments and are in the $300-$800 price range. While I've been very spoiled by Janome over the past couple years, I'm excited to be showing you guys some other options. 

Bottom Line

The Janome Skyline S7 is an amazing choice for the serious sewist who wants to make gorgeous handmade garments, quilts, accessories, home decor items and heirloom pieces. It has an astounding number of features to satisfy the most creative and advanced sewist, but it's simple-to-use for a more mid-level seamstress (or seamster?) looking to grow into a machine. 

Want to learn more? Check it out on Janome's website! 

Birkin Flares Tester Photos

SewingLauren DahlComment

Wow!!! Thanks, you guys, for all the support of the Birkin Flares release! It makes me so happy you guys like the pattern and want to delve into jeansmaking. The response yesterday was beyond my biggest hopes, so I am gratified and relieved. (They like me, they really like me!)

One thing that a lot of you asked yesterday was to see some tester photos on different bodies. It's one thing to see how a sewn garment looks on the designer (since typically we design and tweak our patterns for our own shape/preference), but it's another thing entirely to see the fit on different shapes. 

So, at your request, I have a TON of tester photos! I'll probably have a few more as well when the rest of the testers have sent me theirs. Stay tuned for that. But in the meantime, feast your eyes on these gorgeous ladies!

(Note: Some of the jeans in the photos below were sewn exactly as presented in the pattern. Others were modified slightly to fit individual body types. It would take hours and hours for me to go through all the tester notes and list here what changes were made. However, the takeaway is that it's easy to alter these jeans to get an absolutely custom fit! Sometimes it can take making and wearing a version for a little while to know exactly what tweaks you want to make in a future version, but that's part of the fun of the journey toward creating a handmade wardrobe. Be sure to consult the Baste + Gather Sewing Chat group on Facebook to discuss tweaks or get suggestions for your Birkin Flares!)

Click on any of the photos below to take a closer look at the photo. Links to the respective sewists' blogs are located above their images. When applicable, I have linked to their specific posts about the jeans.

Andreia of In a Manner of Sewing

Reyna from Reyna Lay Designs

Terri of Blue House Joys

Shaina

Ashley H. (she even made shorts with a small amount of fabric! Love them!!)

Ashley S. 

Chloe of deadlycraft

Jane of Buzzmills

Kate from Fabrickated (Part 1, Part 2)

Emi of Just Add Fabric

Rebecca from Finn's Door

Lindsay of Lindsay Tailor

Ready to get the Birkin Flares for yourself? 


The Birkin Flares Are Here!

Sewing, My HandmadesLauren DahlComment

They're here! They're here! They're here!!

When I think about this pattern release, I have this image in my head of Julie Andrews singing with a mountain in the background. Because really, being done with this pattern makes me want to shout from the rooftops. I mean, I have released patterns before, but this one makes me SO. FREAKING. HAPPY. Mostly because it has made so many other women happy already. I haven't seen anyone who doesn't look like a rockstar in these jeans. And that gives me all the warm, fuzzy feelings. 

With that, I present to you my newest sewing pattern: the Birkin Flares. 

Let's talk about the design features of these jeans. First, they obviously have a flared leg - and if you've spent any time looking at Pinterest or perusing fashion magazines lately, you know these are ALL the rage. Now, I'm not normally one to jump onto fashion trends, but anything that reminds me of my high school/college days is a win in my book. It took me a long time to jump on the skinny train, and honestly, I'm still not completely sold on them. They definitely have their place in my Pacific Northwest wardrobe (read: rain boots), but I feel my best in a good pair of flares. 

Next, the waist on these girls is high...but, you know, not so high that they're digging into your ribs or causing your husband/boyfriend/significant other to give you the side eye and ask you what decade you're from. Personally, I adore a high-rise jean because...well...ladies, I've had three babies. And despite having lost the baby weight, my waist is not what it used to be. It's...higher? More pronounced in the back? And on the sides? AND in the front? And don't get me started on how low-rise jeans are constantly falling down and/or giving me a muffin top.

Well, I don't have any of that with these jeans. The high-cut and negative ease at the hips and waist suck everything in just perfectly and keep everything where it belongs. Bend over. Chase your kids. Wear them three days in a row. Go on a date. Do a full day's work. Feel like a million bucks. Look absolutely amazing. AND BE COMFORTABLE while you're doing it.

That's what the Birkin Flares deliver. I'm not gonna lie to you guys - I call these my secret sweatpants. I feel so good in them. But my testers can confirm - these jeans are going to get some compliments when wearing them. I can assure you of that. 

Speaking of testers...I had an astounding 40+ fabulous ladies to sew these jeans up before feeling like they were ready-for-the-world. I was lucky that the original pattern was pretty OK from the get-go, but we did make a couple changes.

First, we shortened the front rise by 1/2". I'm not one to obsess about wrinkles in the front of jeans because almost everyone has those even with the best-fitting, ready-to-wear jeans. BUT, I did think a small amount was necessary for a better, more universal fit. Also, we removed a 2" wedge from the center back to cinch them up and prevent gaping. (The pair in these photos does NOT have the 1/2" removed - they were made before the change. They do have the 2" wedge removed from the back, however.)

Since the waistband is cut with stretch, it's still plenty comfortable despite being fitted. Since the jeans sit right at or just below the natural waist, it's okay for the waistband to have some stretch since the hips hold up the jeans (as opposed to low-rise jeans that can fall down because they don't have as much to hold them up). 

Other than that, we made some changes to sewing instructions (mostly at the fly front to give an extremely professional, ready-to-wear finish and to ease the task of topstitching) and fixed a few small errors. I also gleaned a lot of knowledge that I'll be sharing with you in an upcoming sew-along.

For example, some of you noticed that my fly was gaping open a little in my original tester call photos. In my case, that was mostly because I often sew hurriedly with three little ones at home. But several of my testers experienced the same issue, and we found a few causes. The instructions now spell out exactly how to avoid those problems and to achieve the perfect jeans. 

Currently, the pattern is available in waist sizes 24-35. All the sizes go in 1" increments (instead of graduating to larger increments at the upper end of the size range) to provide a more customized, precise fit. I have had some requests for an extended size range, and that might happen. I just can't give a timeline at the moment or make any promises. (Putting out patterns while keeping house/kids/etc. is tough, y'all!)

As shown, I am wearing a size 26 sewn in this fabulous denim that just became available TODAY in the Indiesew shop. (Don't let the heavy weight scare you - while the belt loops were a little tricky, this denim was actually quite lovely to sew!) I am normally one to get home from my "gussied up" photo shoots and immediately change into sweatpants, but I wore these all day yesterday and felt great. My husband even kept saying how good I looked. Awwwwww...but really, when you feel good in what you're wearing AND look good...well, there really is something to that - especially when much of your time is spent cleaning up baby spit and other unmentionables. 

Over the next few days, I'll be showing you a bunch of tester photos so you can see how these babies look sewn up in different fabrics and on a variety of body types. In the meantime, you can get the Birkin Flares pattern by clicking the button below.

 I hope you enjoy making and wearing them as much as I love seeing them on you. 

Top: Grainline Archer Button-Up Shirt
Blazer: Grainline Morris Blazer
Boots: Kork-Ease Velma