I have been wanting a pair of Tencel joggers for quite a while. If you follow me on Pinterest, you know I've been pinning these things like a mad person for months. I even bought the fabric (a lovely Robert Kaufman Tencel denim from Fabric Depot's retail store here in Portland for which I haven't been able to find an online source) a few weeks ago. But for whatever reason, I was hesitant to cut into it because I hadn't fully settled on a pattern and which details to incorporate into my final garment.
I knew I wanted blue Tencel like you see on the left and right below, but I wanted some additional details and distressing like you see in the middle.
I have made several pairs of knit Hudson Pants (that I love but haven't blogged because pregnancy), but I couldn't commit to making a woven pair without knowing if they'd fit. I'd read several other bloggers' (and the designer's) recommendations to make them two or three sizes bigger, but still...the uncertainty! I also knew I wanted to try to distress them a bit to keep them looking like Grandma capris. Ultimately, I ended up making two sizes up from my normal 6 - so these are a 10 with no other fit modifications.
Well, I think I succeeded at everything above since this is my finished product (!!!):
I absolutely love them!
BUT... (womp, womp, womp)
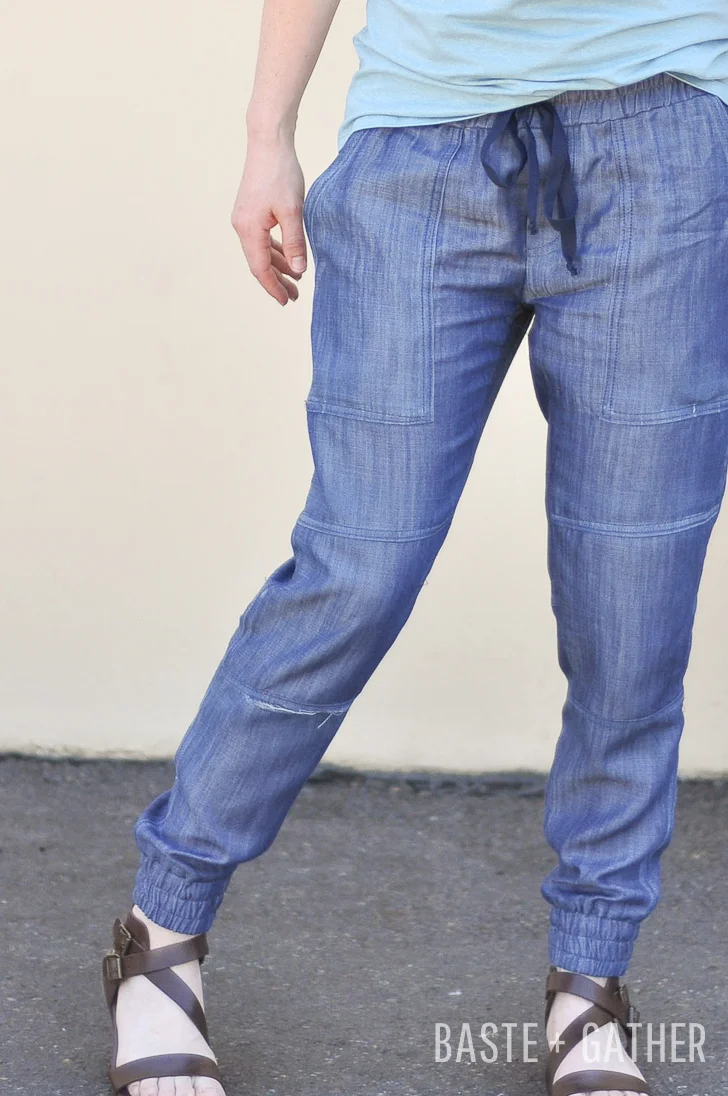
Distressing this lightweight denim Tencel, while good-looking, wasn't the best idea. I noticed as I was sewing them that some of the distressed areas around the seams were getting pretty thread-bare, but the distressing still wasn't as noticeable as I wanted. The bottom line is that distressing is probably best saved for heavier denim, canvas and sturdy twill because when I bent down to feed my cats this morning, I blew out the knee of the pants (as you can see in the top photo above!).
I wore these to the fabric store today to pick up a pressing clapper and some Swedish tracing paper, but I was terrified the whole time I would blow out the center-back seam. I made sure to not bend over! I might make an attempt to reinforce/patch these, but either way, I will wear these at home and make more withOUT the distressing (or a heavier fabric WITH distressing).
Here are all the modifications I made to the pattern to get this result.
First, I removed the pocket cutout from the front pants pieces by holding the traced piece over the pocket piece on the pattern and completing the shape, like so:
Next, I used the pocket piece from the Cali Faye Collection Basics Pocket Skirt (which I made here) to create a pocket pattern piece. I traced it onto my front pant pieces to make sure the top and side would match up, and then I traced it onto a new piece of tracing paper to have a stand-alone piece.
(See how it doesn't perfectly match up at the top and side? That's why I traced it onto the pattern piece instead of just using it as-is.)
Next, I created a faux fly simply by eyeballing it on my pattern and adding a seam allowance like you see below.
For the ankle bands, I simply used the height of the waistband (since I planned to use the same elastic) and measured the leg openings at the bottom to see how wide to make them. You will need to do this yourself since it varies based on size.
Next, I used the inside leg notch on the front leg pieces to use as a reference point for the knee. I cut the pattern open about 3.25" above and below that notch to create the knee panels on the front.
I made myself a little note to add seam allowance rather than re-tracing them. I did the same for the back, but I cut it right at the notch instead of having a panel. In other words, there's only one seam across the back of the leg instead of two like in the front.
I serged the two long edges of the pockets and folded them under/pressed about 1/2". I finished the slanted edge with a little bias tape I made from leftover Tencel denim. I topstitched the slanted edge and then sewed them onto my pants front pieces.
For your reference, I did my topstitching with the triple stitch on my sewing machine, and I placed two rows - one about 1/8" from each edge and another about 3/8" from the edge.
I pieced everything else together, distressed and topstitched as described above. I also drafted some pockets for the back based on a pair of linen RTW pants I already own:
If you don't have a pair of pants with pockets on them, you can use my pocket measurements. These were 6.5" wide by 7" tall, and I serged all the edges and folded them under 1/2" on the sides/bottom and 1" at the top. I also created the fun little angled corners on the bottom which you can easily do if you like.
I totally eyeballed the pocket placement, stuck them on with Wonder Tape, checked in the mirror, readjusted, and sewed. I put them on as a last step, but normally you would put these on before piecing the front/back of the pants. I wanted to be sure, however, that I liked the placement on my body. It's a little more challenging this way, but it's not impossible.
Finally, I added the leg cuffs in the same manner as the waistband.
Et voila! Here is my finished result!
If you're wondering about the distressing, I will be discussing this more in a future post when I talk about the jeans I'm working on (hint: a 220-grit sandpaper)! In the meantime, you can check out Sewing Designer Jeans with Angela Wolf (affiliate link) on Craftsy. I took it and soaked in every. single. word. It's where I learned all my distressing techniques, and I'll be going through each lesson again as I work on my jeans. (The first time around, I simply watched/listened while nursing my little guy!)
As for the fabulous t-shirt, it's a Union St. Tee by Hey June Handmade in a great Triplex Heather from the Sew Kinetic store.
I'm going to be making more woven Hudson Pants using my now-perfected pattern and knowledge. What about you? Have you gotten the woven Hudson bug? Have you sewn with Tencel? Isn't it amazing?!