I call this pattern the "Embellish This!" Hat because it's a super-simple project just waiting for the perfect felt flower or other such goodness. I created this pattern by doing some simple math that you can do, too, to customize it for any size person and any type of yarn. (I'll give you customization instructions after the pattern for the hat as shown in the photo above.) Here's what you need for the hat shown here:
- Size 8, 16" circular needle
- Size 10, 16" circular needle
- Size 10 DPNs --OR-- Size 10, 40" circular needle (if you prefer Magic Loop like I do)
- Heavy worsted/Aran-weight yarn (I used Cascade Eco)
- One stitch marker
- Tapestry needle
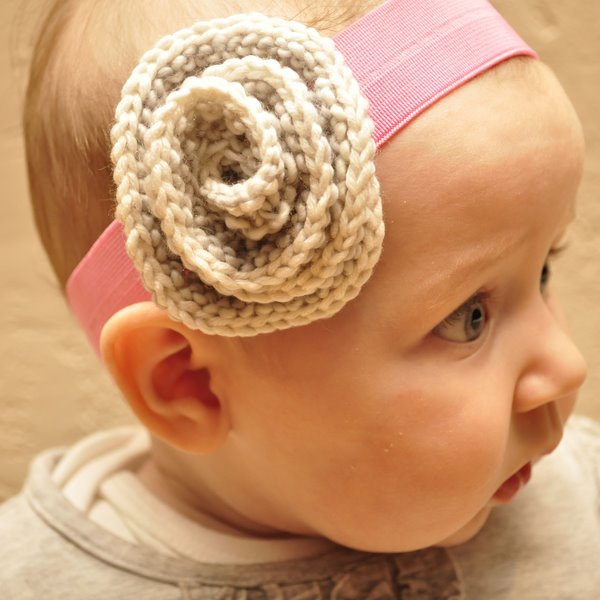
- EMBELLISHMENT! (I used this tutorial to make the felt flower as shown)
Size:
- Hat as shown is for a 16" infant head. (Note that according to the standard sizes in the link at the end of this section, 16" is considered a toddler head. I am not sure if my daughter has a big head or what, but that is her measurement. I would assume she is pretty average. Size up if in doubt - KIDS GROW! FAST!) My daughter is 5.5-months-old. This pattern must be worked in multiples of 8, so for every 8 stitches you increase or decrease, you will increase or decrease ABOUT 2". For reference, standard head sizes can be found here.
Gauge:
- Mine was 14 stitches/4" for the hat as shown. OR, you can use the math that I'll share with you later to customize YOUR hat to YOUR gauge.
Pattern:
- Cast on 56 stitches using the long-tail cast-on method and size 8 circular needle.
- Place marker, and join to work in the round. Be careful to not twist your stitches.
- Work in K1/P1 ribbing for 1.25" (6-7 rows) or as desired. I like to knit my tail yarn into the first five or six stitches and then cut it so I don't have to weave it in at the end. You can do that if you like.
- Switch to size 10 circular needle.
- Continue knitting in stockinette stitch (knit every round) until work measures 3.5" (measure from the cast-on edge, NOT the end of the ribbing!)
- Begin decrease sequence. You may switch to DPNs or Magic Loop whenever you feel it is necessary.
- (K6, k2tog) 7 times.
- Knit around.
- (K5, k2tog) 7 times.
- Knit around.
- (K4, k2tog) 7 times.
- Knit around
- (K3, k2tog) 7 times.
- Knit around.
- (K2, k2tog) 7 times.
- Knit around.
- (K1, k2tog) 7 times.
- Knit around.
- K2tog 7 times.
- Cut yarn, leaving a 10" tail. Thread it through the tapestry needle and pull it through the remaining 7 stitches. Cinch it tight, and pull it to the inside of the hat. Weave in the yarn and cut the tail short.
- EMBELLISH AWAY! You may also block the hat if you so desire, but it isn't really necessary.
See? I told you it was EA-SY!!
Okay, so, maybe you don't have a stinkin' cute baby like I do. Maybe you want to make this hat for, say, a 16-year-old boy or even your cat, or your large-headed cousin. And to make matters worse, you want to use a different yarn.
AHHHHH! Right? Nah. I got that. Here's how you do it.
- Measure the person's head for which you want to make the hat, or use the standard head measurements shown here.
- With the yarn you wish you use and an appropriately sized needle (check your yarn packaging to get a good idea of what will work), do a gauge swatch in stockinette stitch to figure out how many stitches per inch you knit.
- Multiply the hat recipient's head measurement in inches times the number of stitches per inch you knitted in your gauge swatch. For example, if you want to knit a 20" hat for an average-sized woman, and your gauge was 5 stitches per inch, you would multiple 20" x 5 stitches to get 100.
- Round that number up or down to the nearest multiple of 8 to determine how many stitches to cast on. It is up to you whether you round up or down - I just base my decision on whether I want the hat to fit a little tightly or loosely. Round down if you want it tighter, and round up if you want it looser. So in the example I'm using, I would round 104 since it's a multiple of 8 (8 x 13 = 104) and I want to err on the loose side.
- Using a needle two sizes smaller than the needle you used for your gauge swatch, cast on the correct number of stitches.
- Place marker, and join to work in the round.
- Work K1/P1 ribbing for 1-2 inches as desired.
- Switch to larger needle.
- Work in stockinette stitch until the work is as long as desired. I can't give you an exact measurement here since heads come in many shapes and sizes, and people generally like different heights of hats depending on their personal styles. Your best bet is to try it on the person you are knitting it for as you go and begin your decrease sequence when you want the hat to start curving inward toward the crown of the head.
- Begin the decrease sequence. You may switch to DPNs/Magic Loop now, or wait until it's necessary. I usually switch about half-way through the decrease sequence. On the first row, work (K6, k2tog) around. Knit the next row around. Then, work (K5, k2tog) around. Knit around. Continue in that fashion (decrease every other row, knit around on the others) until you are ready to cinch up the top. Again, your best bet is to try it on the recipient as you go to determine if you need to add/subtract rows, etc.
I hope those instructions are easy enough. If you have any questions, feel free to comment below! I generally answer within a few hours. :)
Like this pattern? Please let me know in the comments! It gets a little lonely around here with just my little one to chat with, so I love reading your comments!