Okay. I know that some of you are freaking out right now because ZIP FLY and ZOMG and ALL THE HARD THINGS TO SEW.
Let's just calm down. Sewing a zip fly is not hard. Seriously, NOT HARD. If you follow the photos or illustrations in the pattern step-by-step, you will have a fabulous zip fly in about 20 minutes.
Really.
So let's do this.
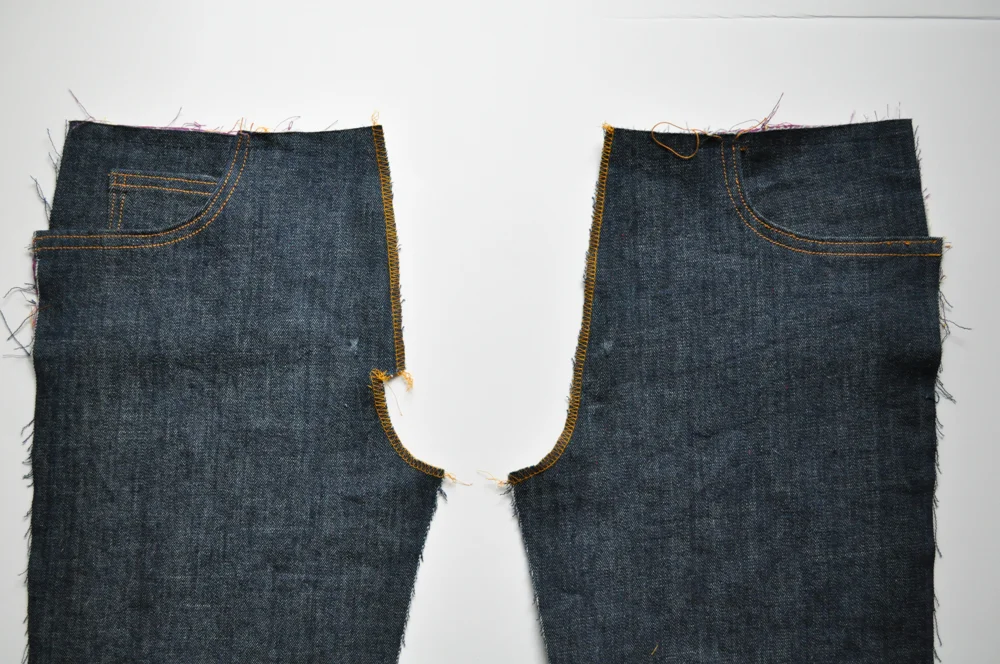
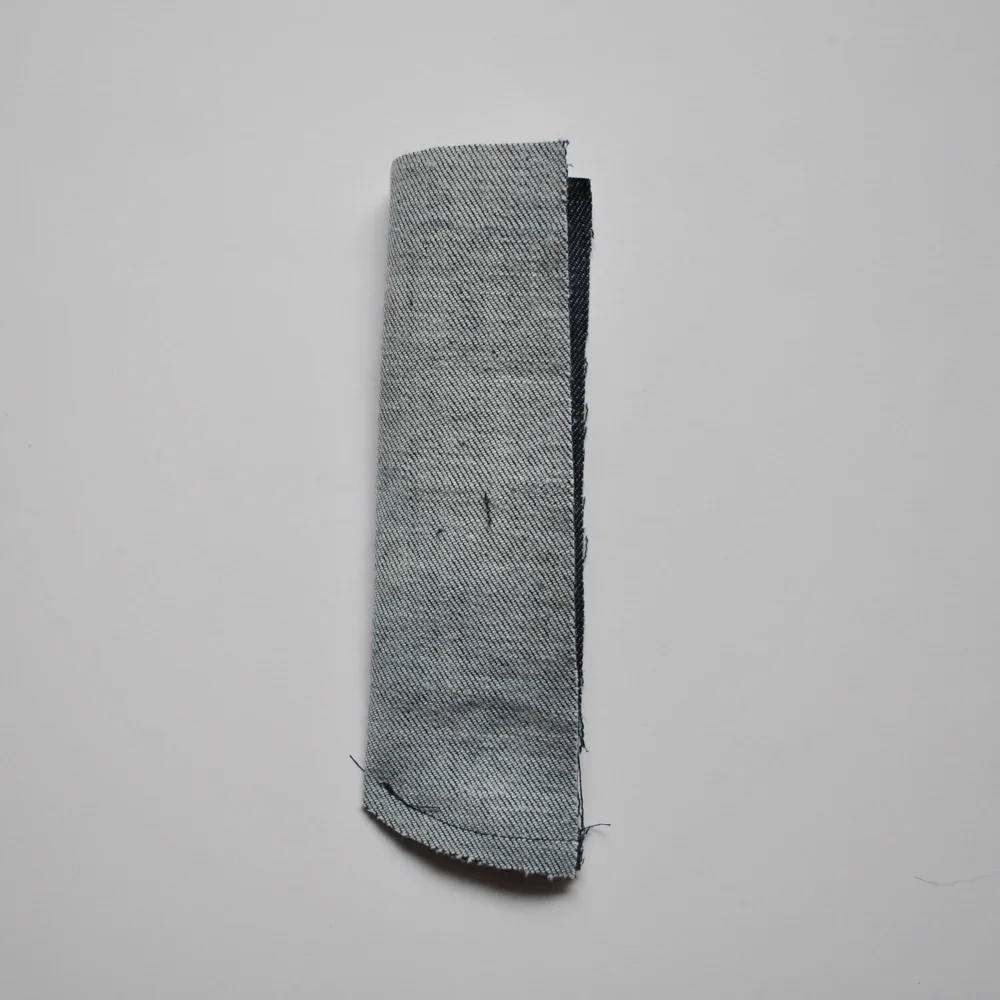
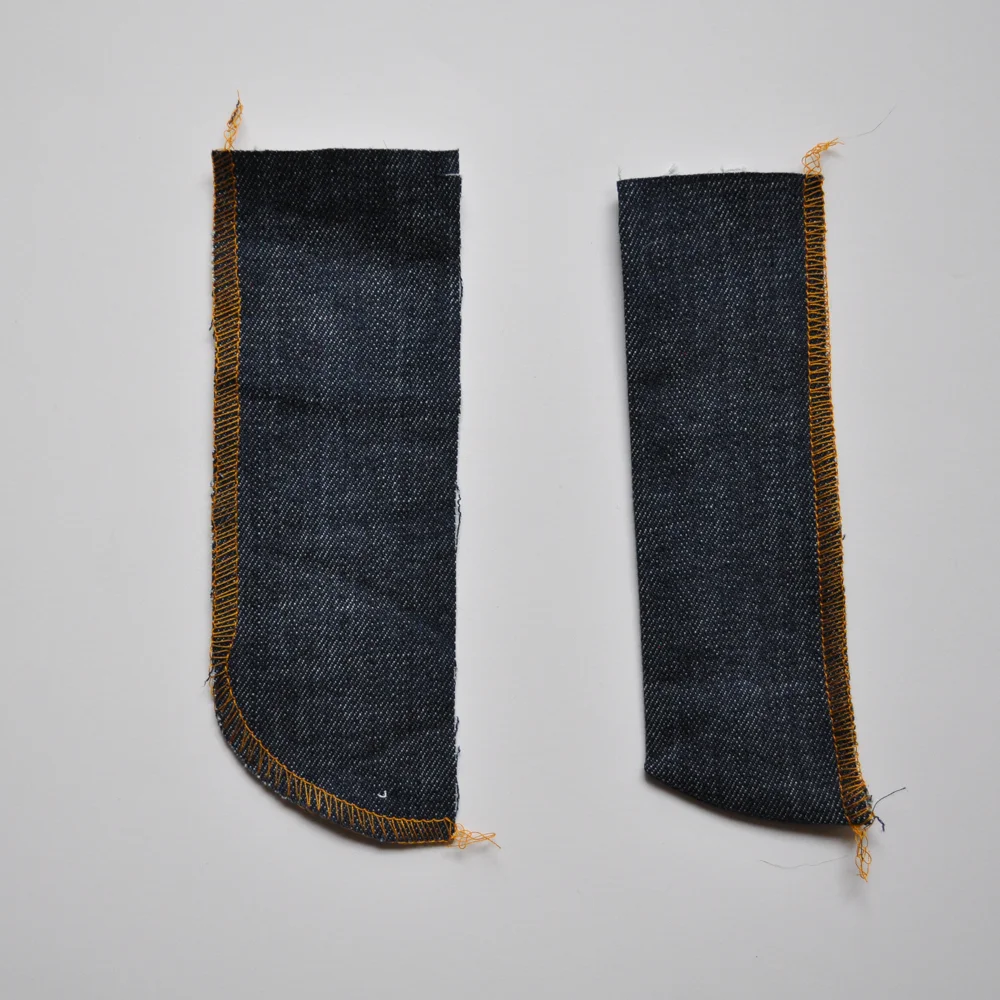
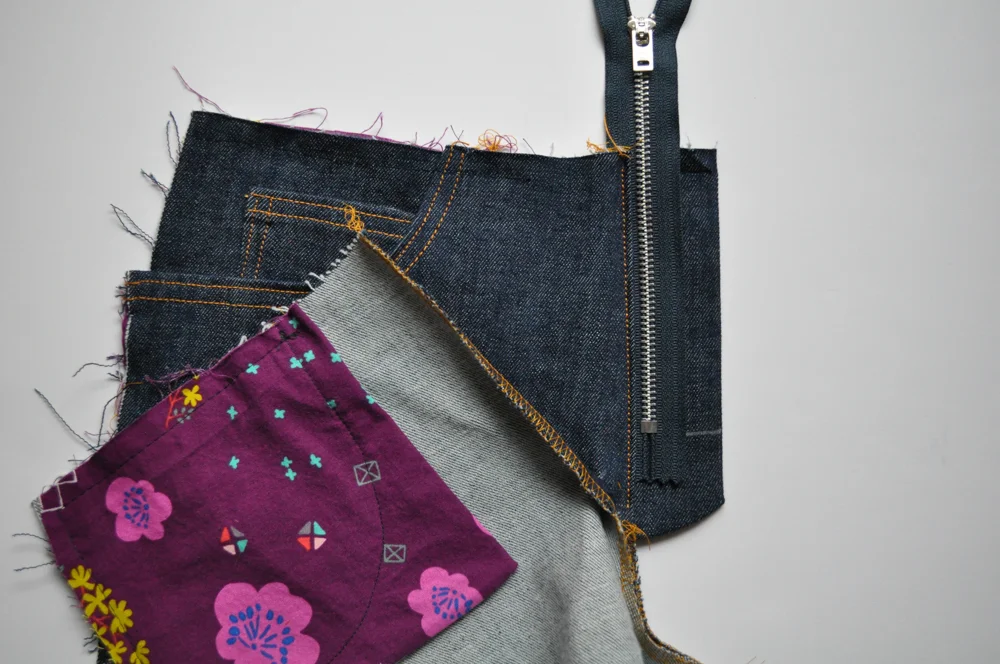
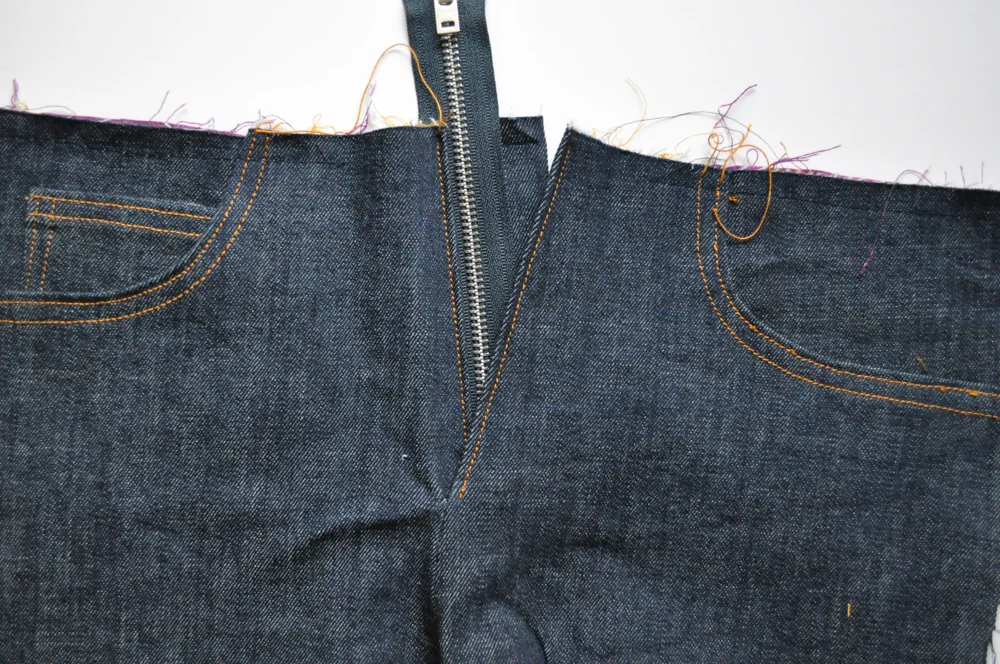
First, serge the front fly edges on the pants fronts as shown below. I recommend disengaging your serger blade, especially on the wearer's right piece, so you don't cut through your fabric at the inset corner.
If you are doing the sew-along in order and following along with the PDF instructions, ignore the fact that there are already pockets attached to these jeans. I did my sew-along in a slightly different order than in the instructions. You can do it as you wish.
Next, use regular thread and sew the center front from the crotch to the marking that you created when cutting out your pieces. You may wish to mark the 5/8" seam allowance before sewing as it can be hard to get it perfect around curved edges without a visual guide. Backstitch a couple times at the marking.
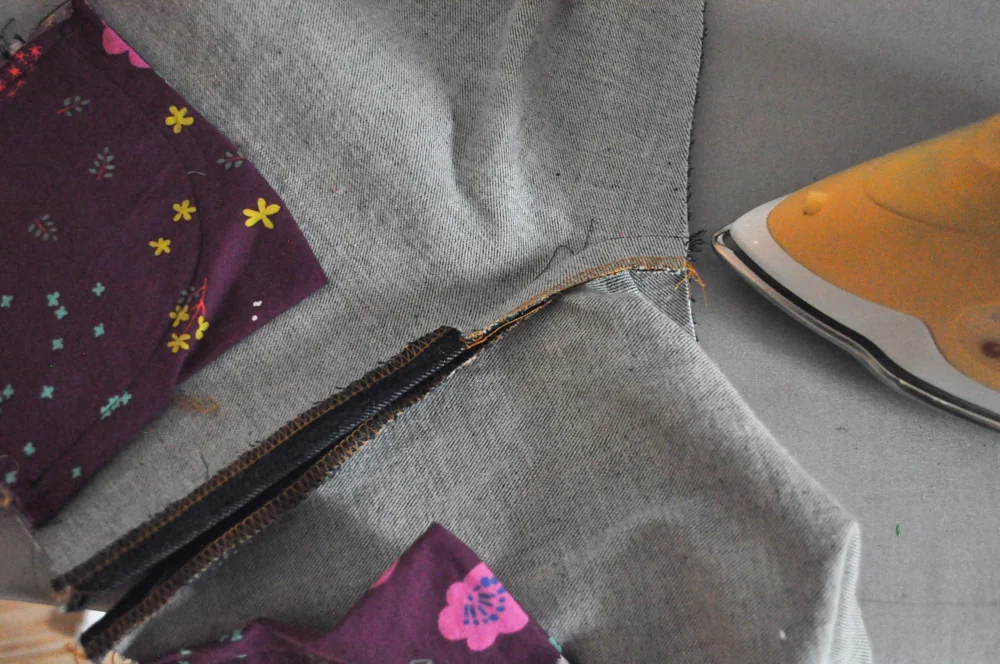
Press the seam allowance toward the wearer's left of the jeans (the side with no fly extension). A pressing ham makes this job easier. Also, press the fly extension on the right front leg toward the wrong side by 5/8".
Next, fold the fly shield in half vertically with right sides facing. Sew the bottom curve with a 1/4" seam allowance and regular thread. Turn it right-side-out, and press.
Serge the edges of the fly shield and fly facing as shown below.
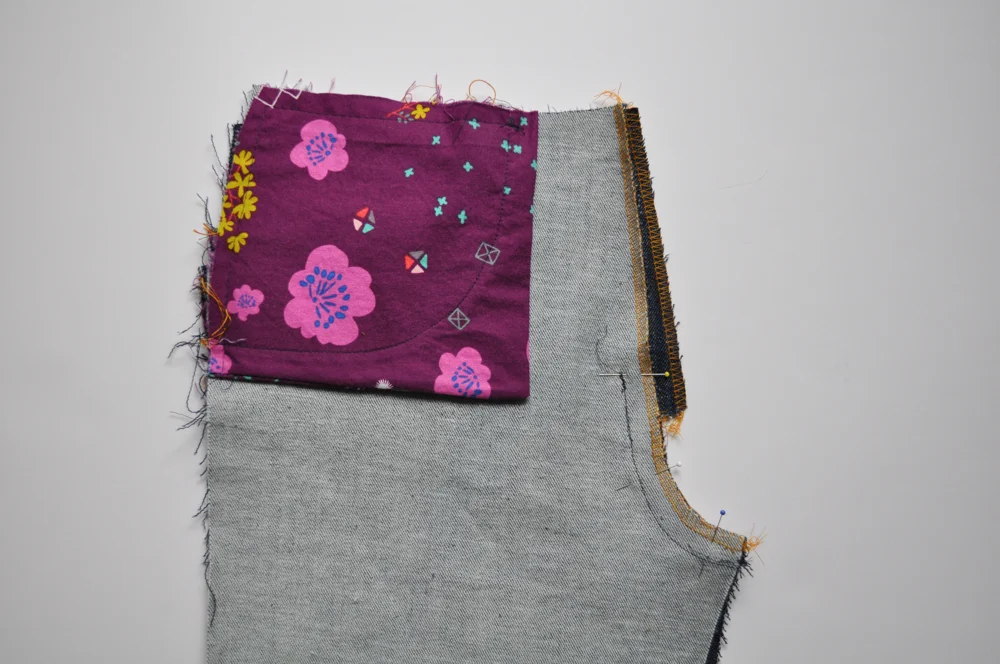
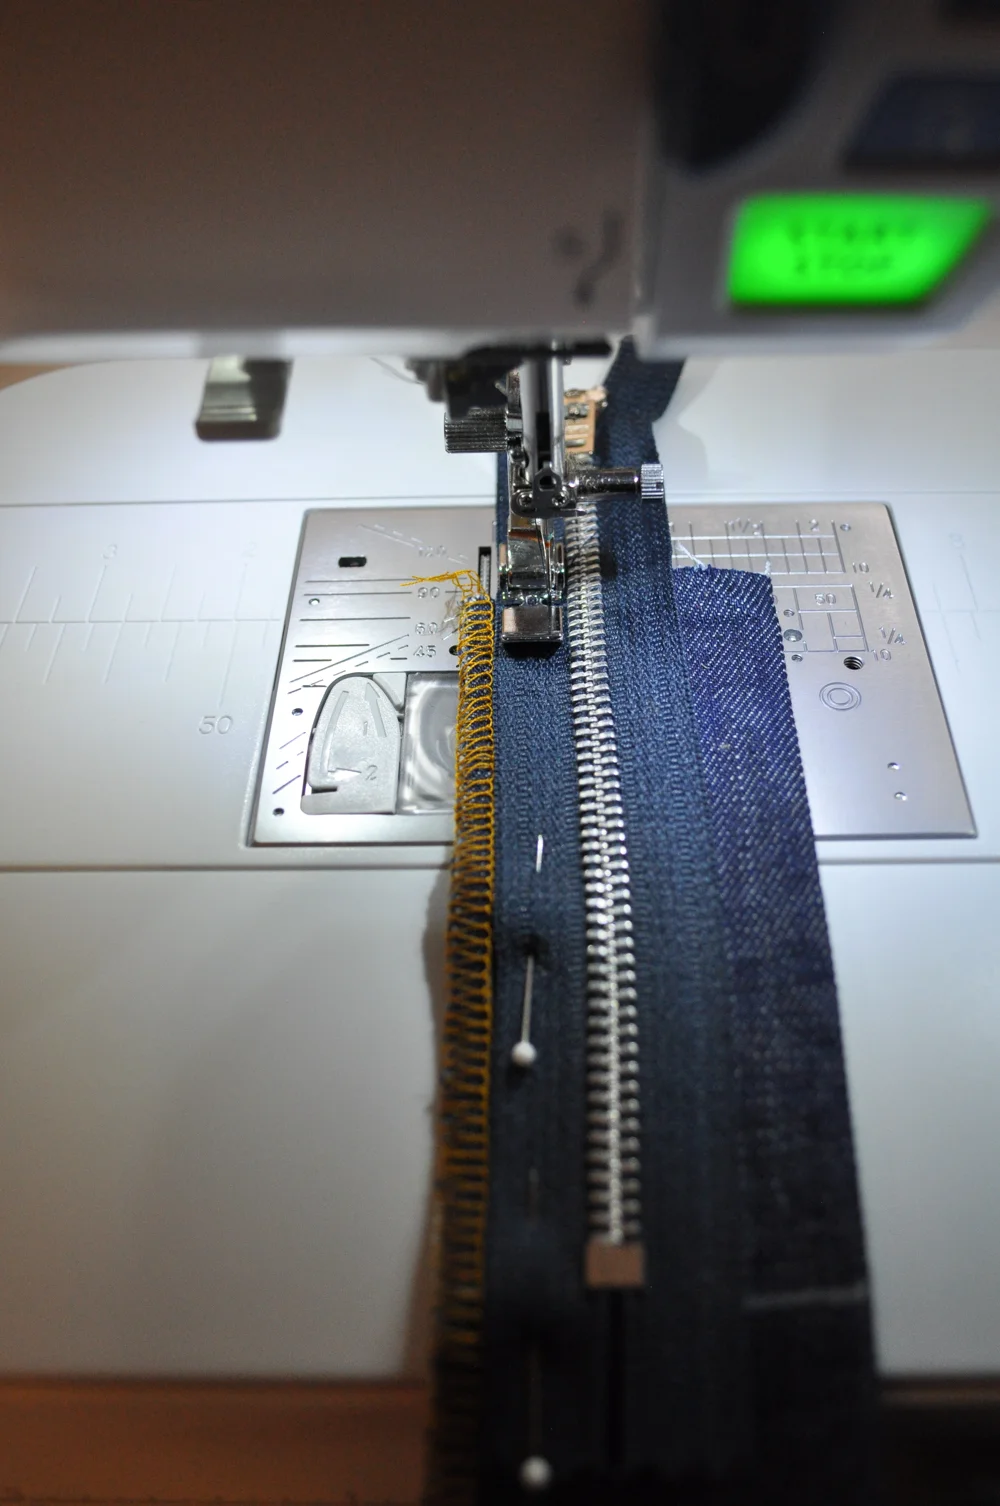
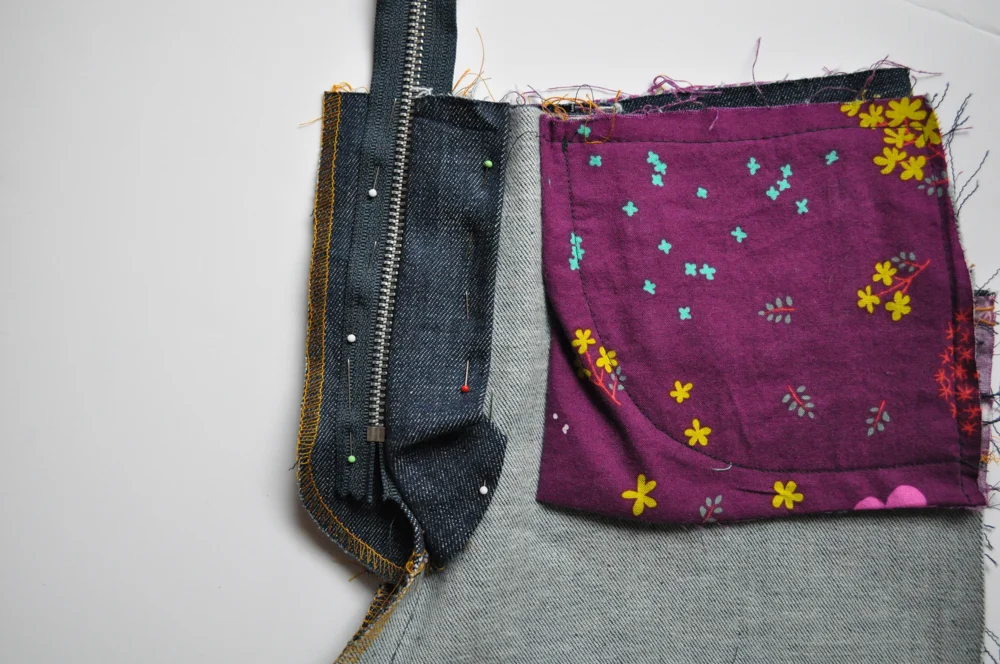
Pin the zipper to the fly shield as shown below. Be sure to place the zipper shield just above the line you marked when cutting out your pieces. The zipper teeth should be 5/8" away from the serged/left edge of the fly shield.
I like to aim the pins upward so they are easy to remove as I sew.

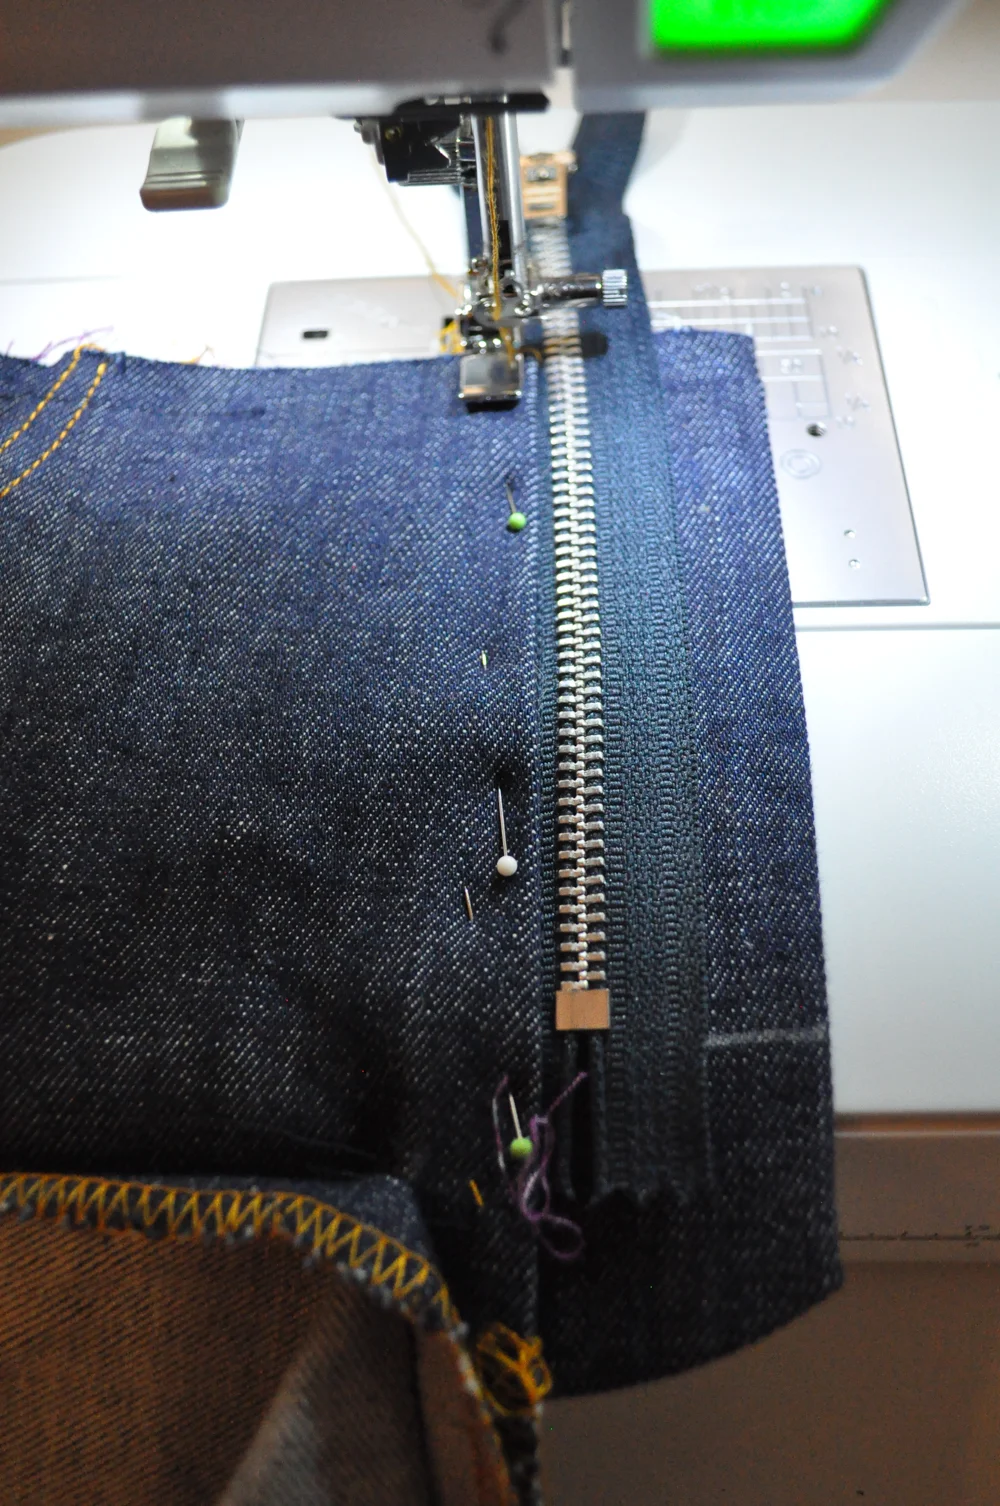
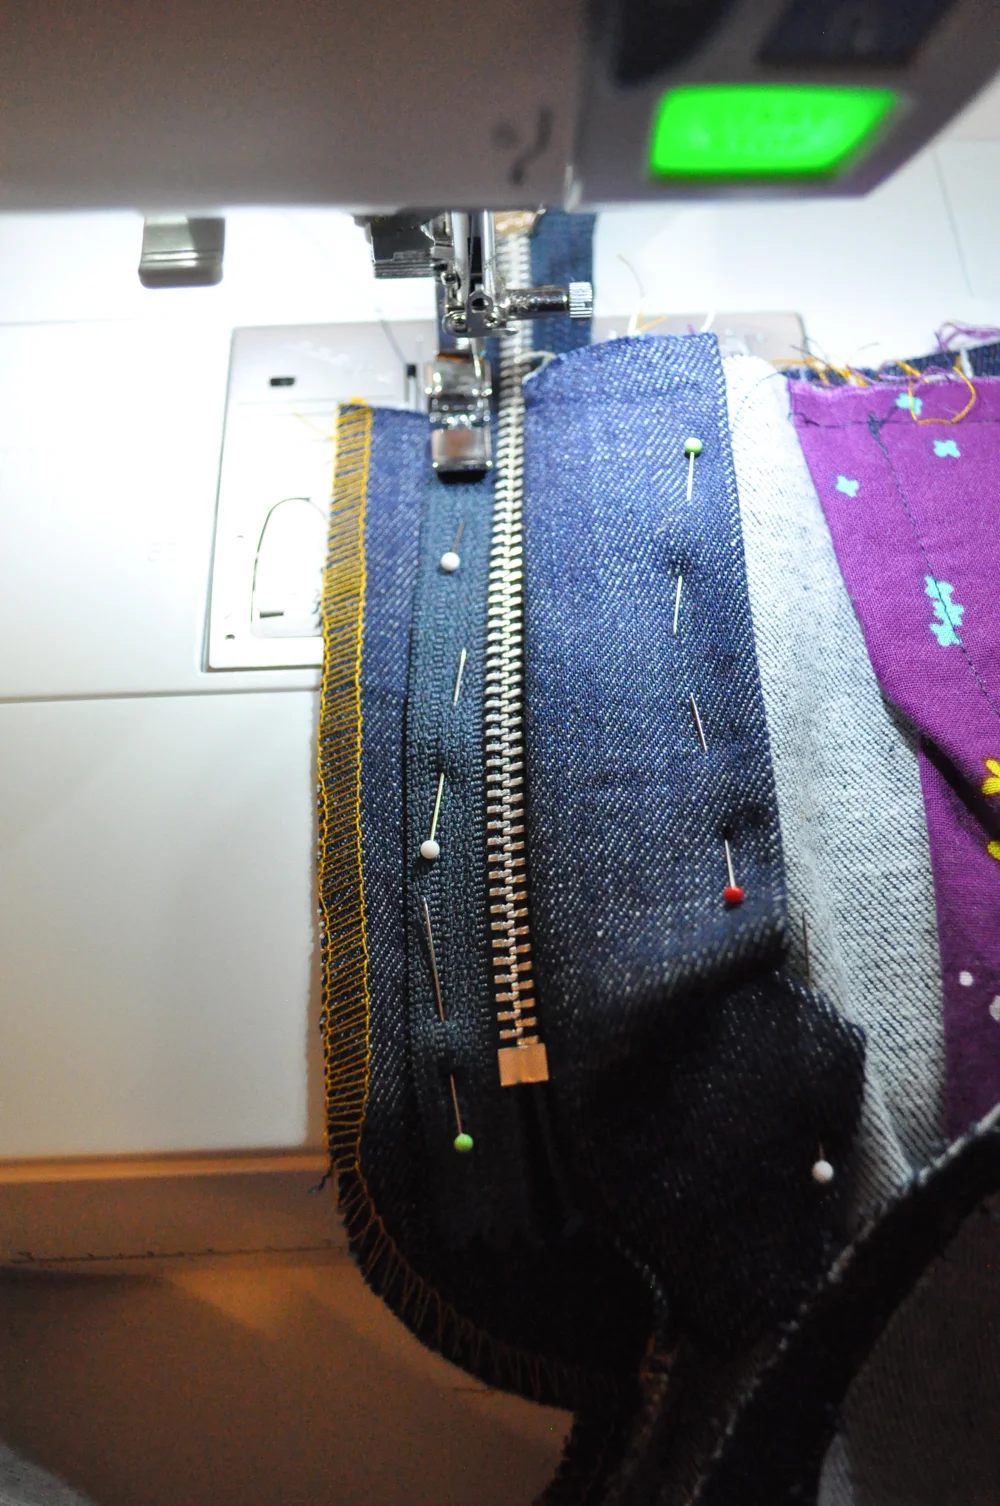
Using a zipper foot and regular thread, sew the zipper to the fly shield as pinned. Your stitches should be close to the zipper teeth. ONLY sew as far down as the bottom of the zipper stop, and backstitch.
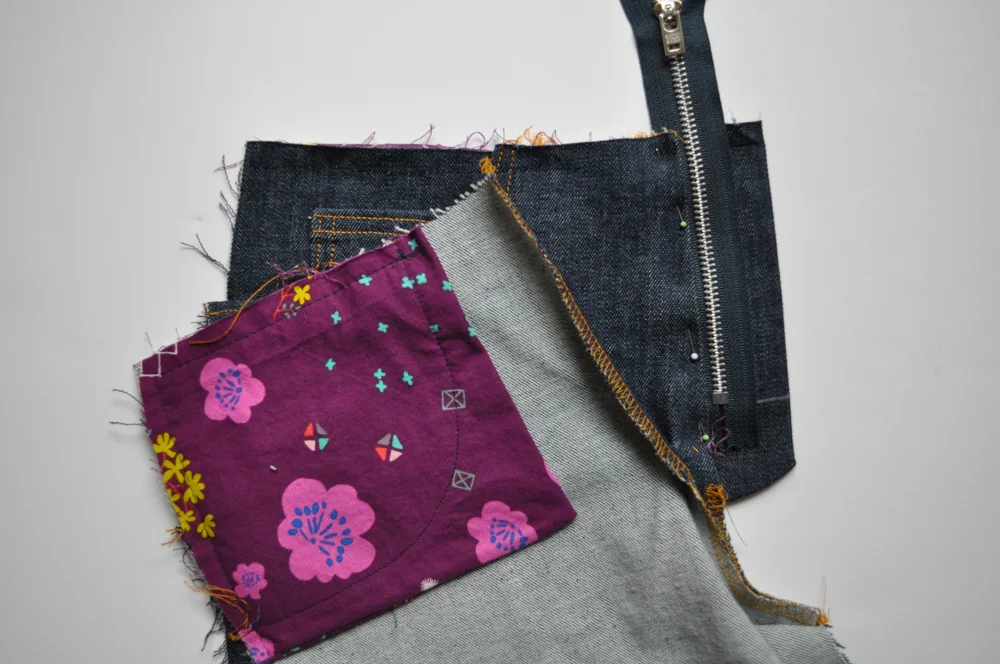
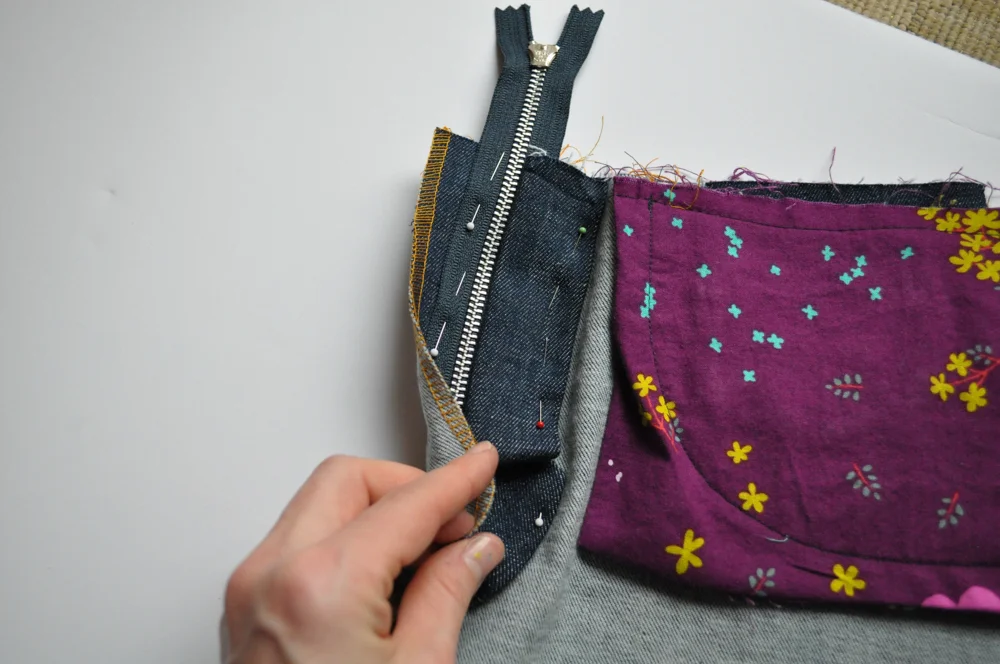
Place the zipper shield and zipper under the right pants leg at the center front where the fly extension is turned under and pressed. Line up the top of the fly shield with the top of the pants front, and align the zipper teeth about 1/8" away from the center front. Pin in place with pins pointing upward so you can remove them as you sew.
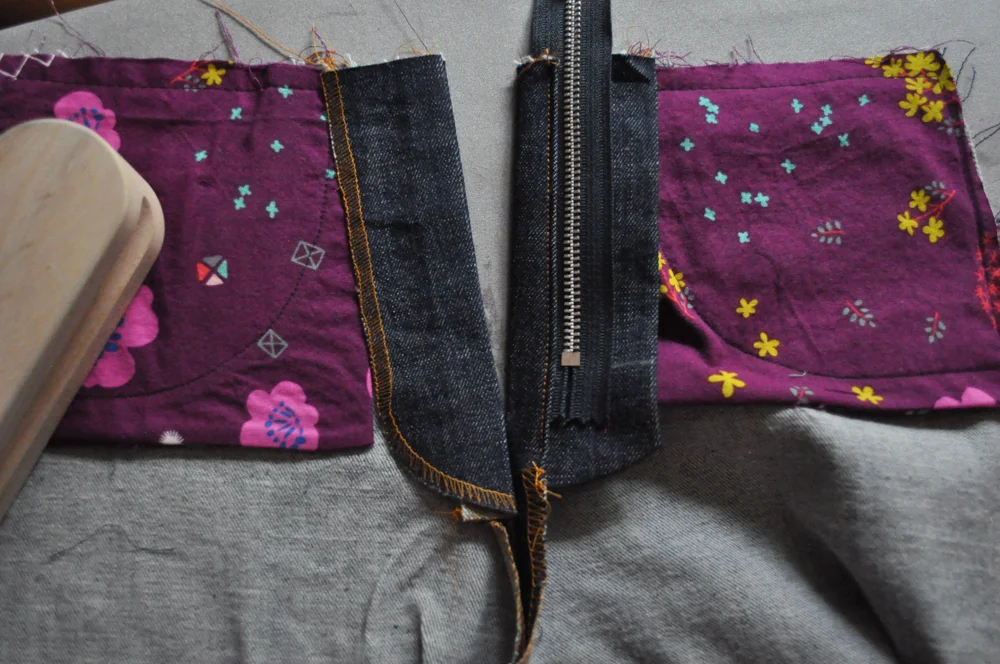
Using topstitching thread, a zipper foot and a longer stitch length, sew the fly shield (with zipper) to the right front leg as shown below. Stop just below the zipper stop.
Your fly will now look like the photo below EXCEPT you will not sew down as far as I did on this pair. Make sure you stop your stitching just below the zipper stop. This is to make topstitching the fly front easier when we get to that point.
While you have the jeans in this position, mark on the left front leg piece where the zipper stop will fall once the fly is completed. You don't want to sew below the zipper stop at any point until we complete the front fly topstitching.
Pin the zipper facing to the left front leg with right sides facing. I used a red pin here (instead of white like the others) to show me where to stop so I don't go past the point where the zipper stop will fall.
Sew it in place with regular thread.
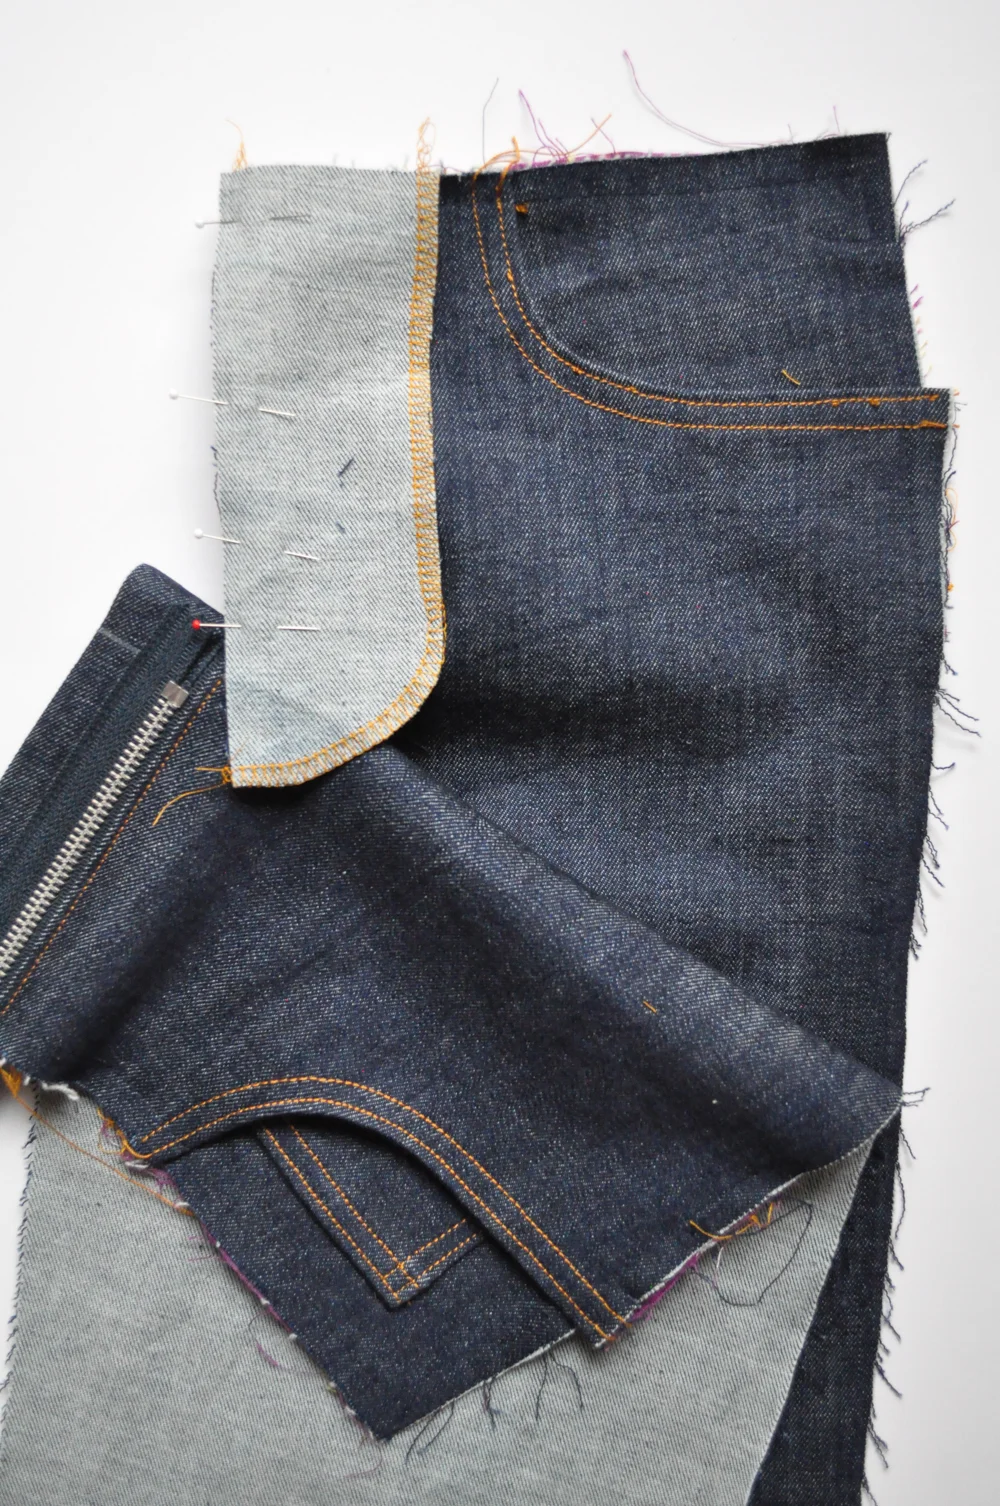
Press the fly facing to the wrong side as shown below.
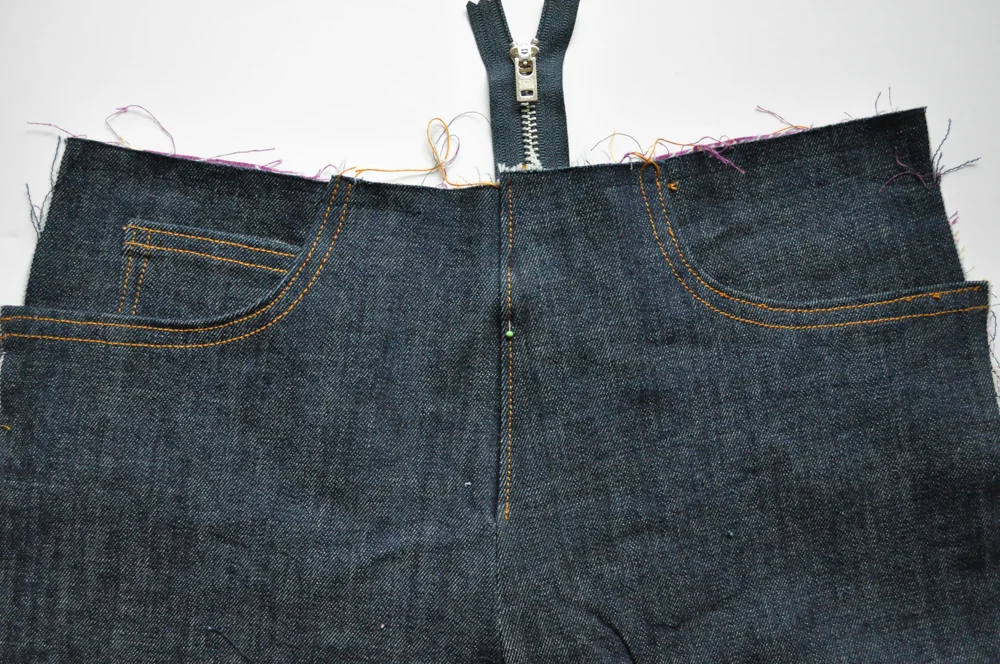
From the right side and using topstitching thread/longer stitch length, sew a line of topstitching 1/8" from the left center front and stopping at the point of the zipper stop. Backstitch a stitch or two.
Pin the right and left front pieces together at the center front. Make sure there are no puckers at the bottom of your front topstitching and that everything lies flat. The topstitching at the center of the right leg should be well covered by the left-side overlap. Pin in place right on the topstitching. There will be a lot of layers to pin through - but you are just doing this to anchor everything together for the next step. You don't have to go through all the layers.
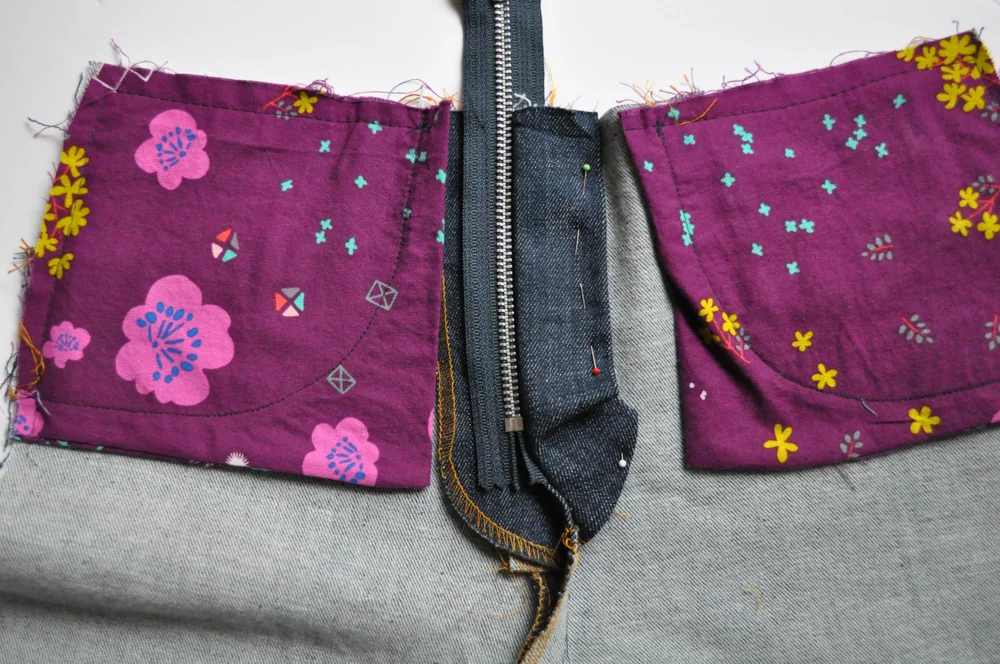
Flip the jeans over so you are looking at the wrong side. Pin the left side of the zipper to the fly facing as shown below. Point the pins upward for easy removal as you sew. You will simply line this up as it feels natural based on where you pinned the center fronts together in the last step. You can flip the jeans back over to the front to make sure everything lies flat.
While you're here, pin the fly shield out of the way on the right side. It doesn't have to look pretty. You just don't want to accidentally catch it in your stitching when sewing the other side of the zipper.
Note that when I photographed the next few steps, I had not yet made the change in the pattern instructions to stop all zipper stitching at the zipper stop. The bottom of your fly shield should be pinned up and out-of-the-way as shown in the PDF instructions.
Be extra sure you are only sewing through the zipper and the fly facing. Everything else should be out-of-the-way as shown below.
Using the zipper foot again and regular thread, sew just to the left of the zipper teeth. Stop at the base of the zipper stop.
Et voila! Almost done.
Leave the fly shield pinned out of the way, and be sure the bottom of it is pinned up as shown in the pattern instructions (and not as photographed here). You will understand why this is so important when you topstitch the fly in the following steps.
Using the provided template and tailor's chalk, draw the topstitching lines for the fly front. Some of my testers preferred to draw one line and then use 1/4" Quilter's Tape alongside it to show exactly where to stitch.
The next step is arguably the most difficult part of sewing jeans - not because the action itself is hard, but because how well you do it can mean the difference in having a fabulous pair of jeans (or not). I sometimes do this step several times over to get it perfect! Do not get discouraged if you have to do the same.
Using topstitching thread and a longer stitch length, stitch along the two chalk lines you made in the previous step. Go slowly around the curve, but try to do it all in one go instead of starting and stopping. I wasn't kidding when I said this part takes practice! That curve can be a real jerk!
When you get to the center seam, stop, and backstitch a time or two on both lines of stitching.
Once you're satisfied with the fly front topstitching, you can unpin the fly shield and let everything fall naturally into place. Using a narrow zigzag/bartack, anchor the fly shield in place along one of the topstitching lines just above where the curve starts.
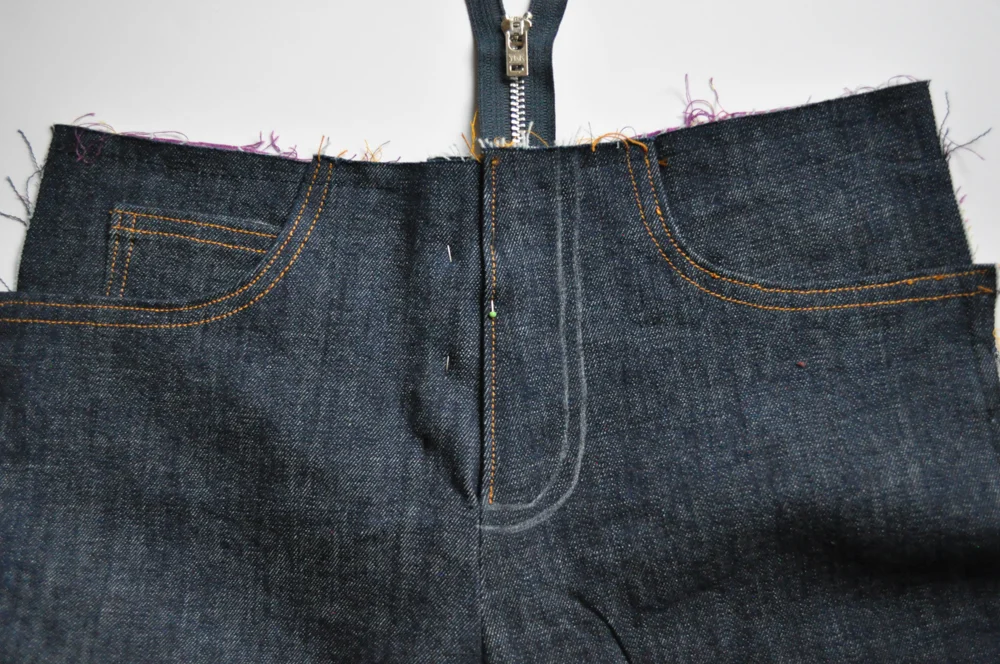
Finally, sew a narrow line of horizontal zigzag stitches near the bottom of the fly and about 1/2"-1" above where the fly topstitching meets the center front. Start at the center front, and make it about 1/2" wide. Once you're done, pivot your jeans and sew a second line of topstitching down the crotch. Angle it in until you are 1/4" from the first line of topstitching. This final step anchors down the bottom of the fly shield and fly facing that we left free to enable the fly front topstitching.

No, your eyes are not fooling you - the jeans above already have the front attached to the back! I just included it to show you how the topstitching should look at the fly. If you have any doubts, look at a pair of RTW jeans from your closet or online.
See, that wasn't so bad, right? If you're having trouble, be sure to compare the photos above to the illustrations in your pattern tutorial, or visit the Baste + Gather Sewing Chat facebook group to get help.